Uniswap Interface 连接私有链
对Uniswap SDK 和 Interface进行修改,私有化部署Uniswap Interface v3.2.20,使其融合私有链。
修改uniswap-sdk并上传
使用node v13.14.0 (npm v6.14.4)
nvm use 13clone uniswap-sdk
git clone https://github.com/Fu-XDU/uniswap-sdk.git使用编辑器打开uniswap-sdk项目,方便修改,我们需要修改以下代码:
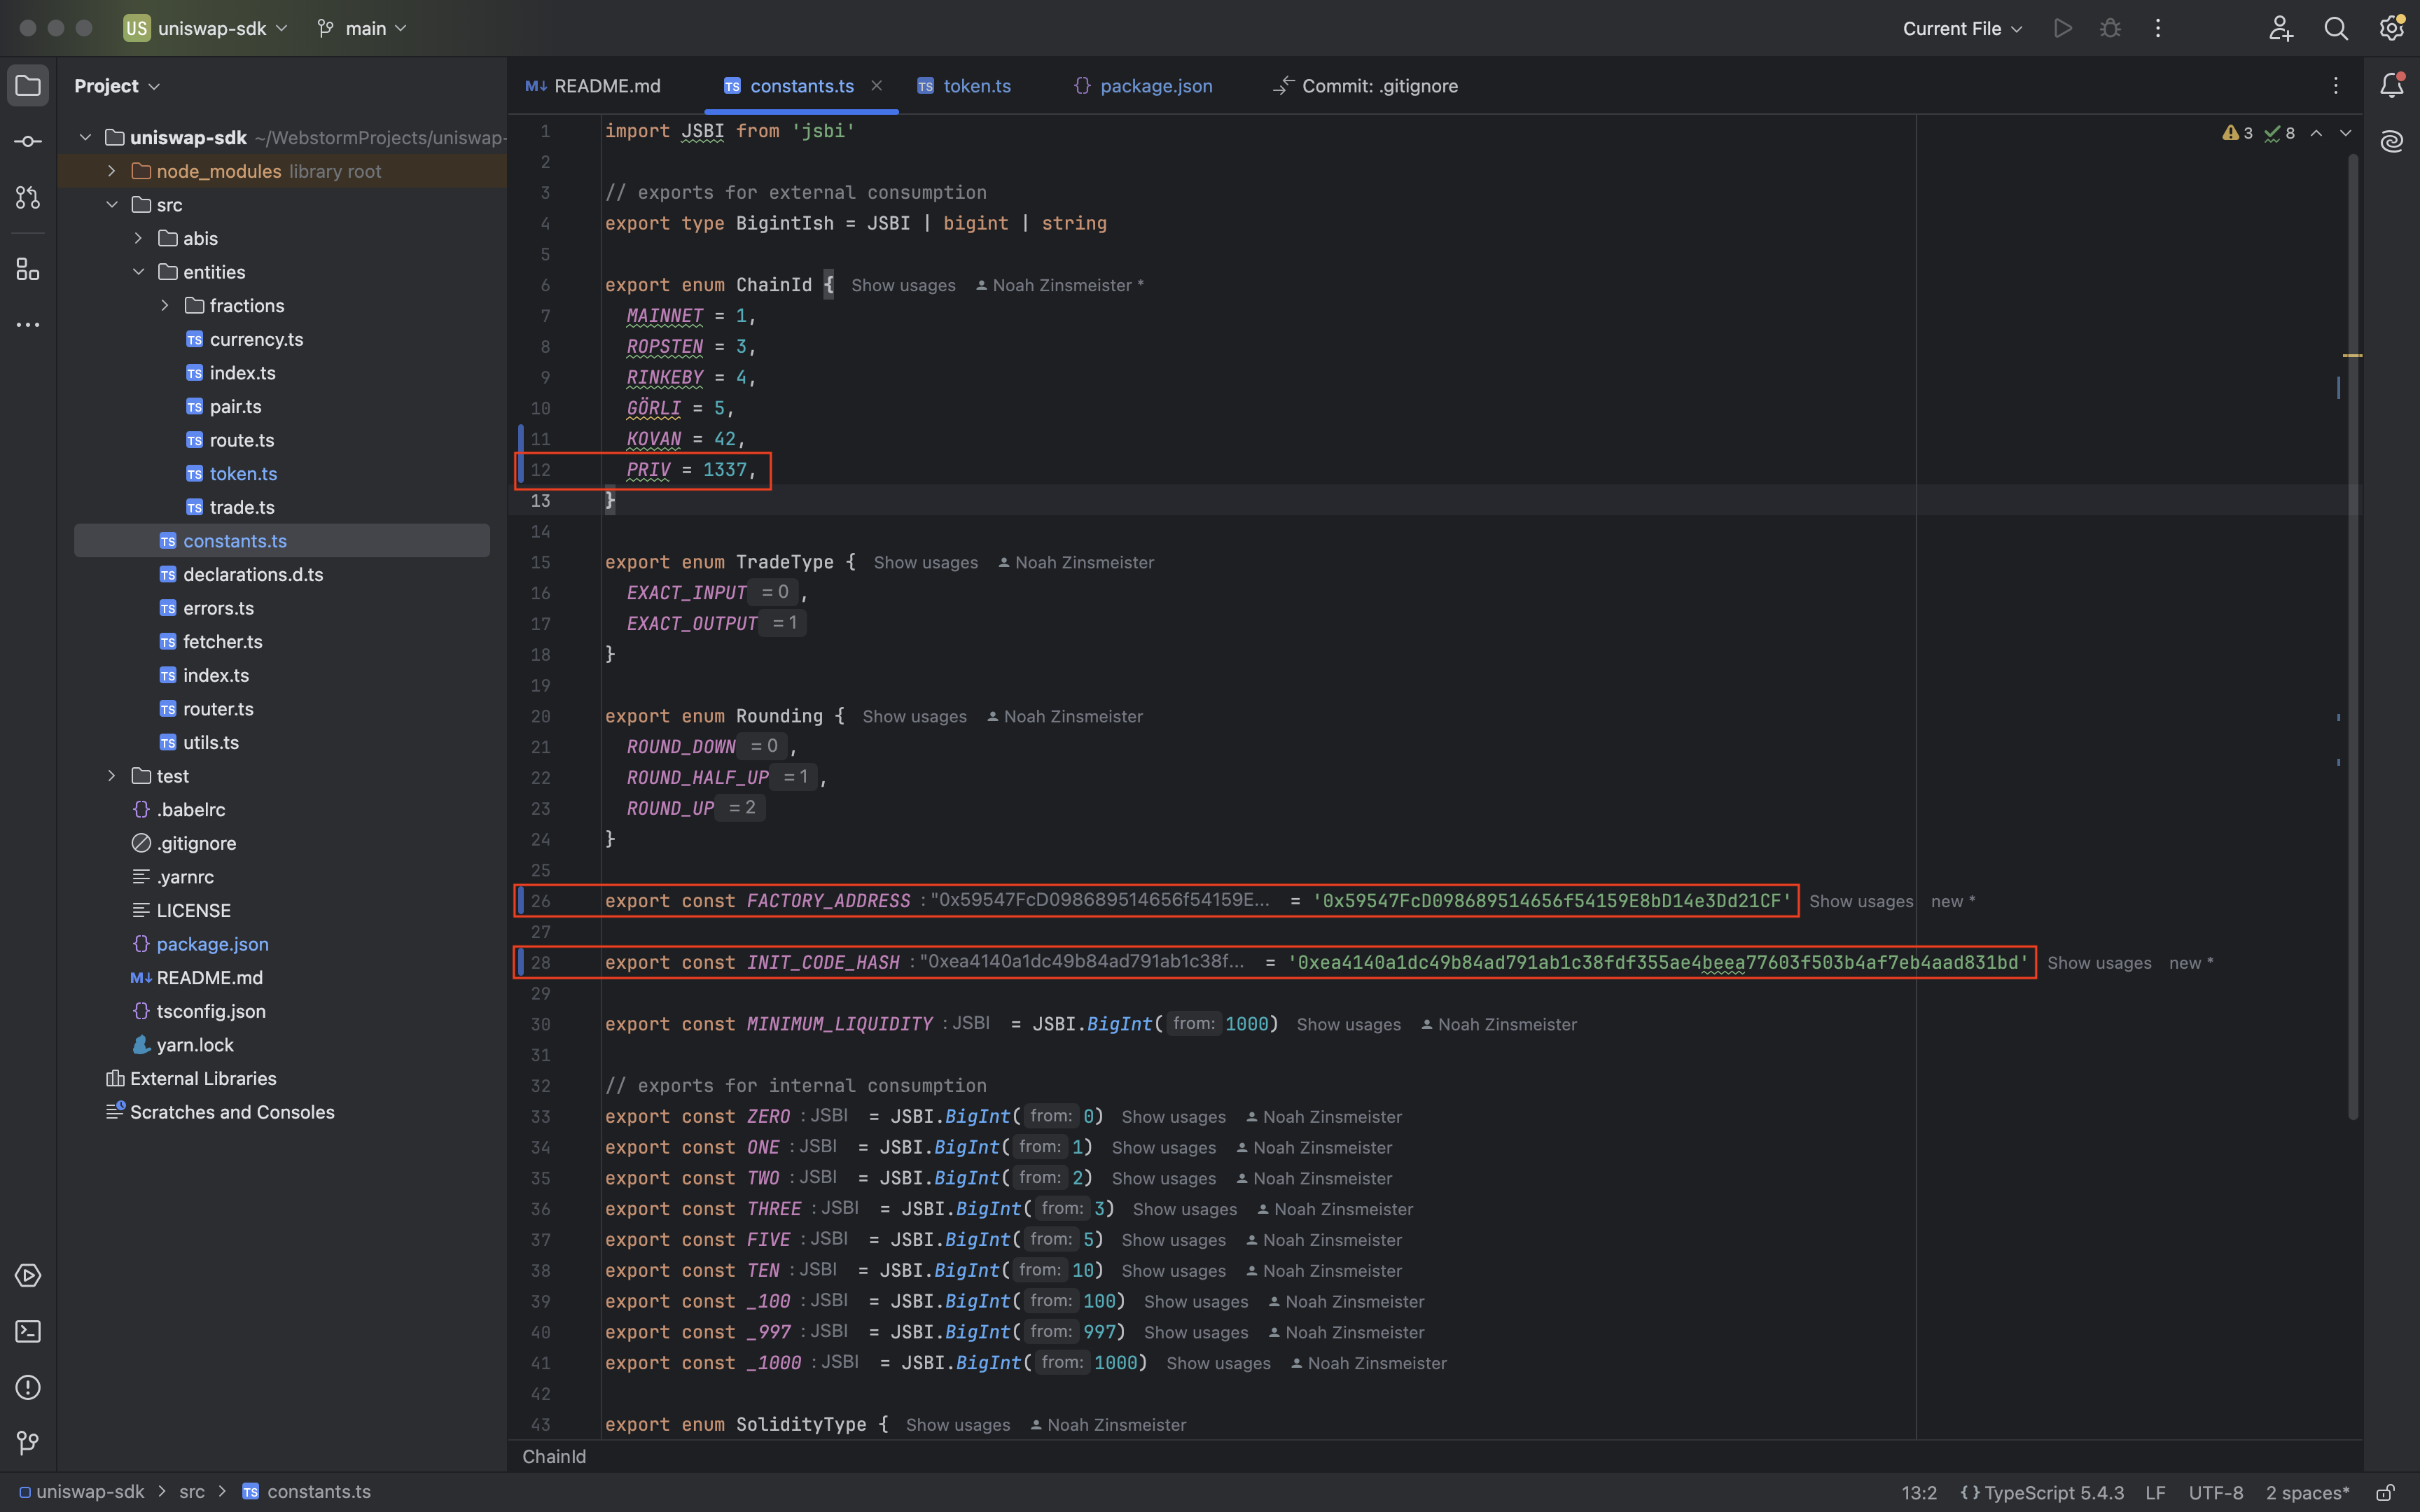
- 添加
ChainID,并修改src/constants.ts文件中FACTORY_ADDRESS和INIT_CODE_HASH
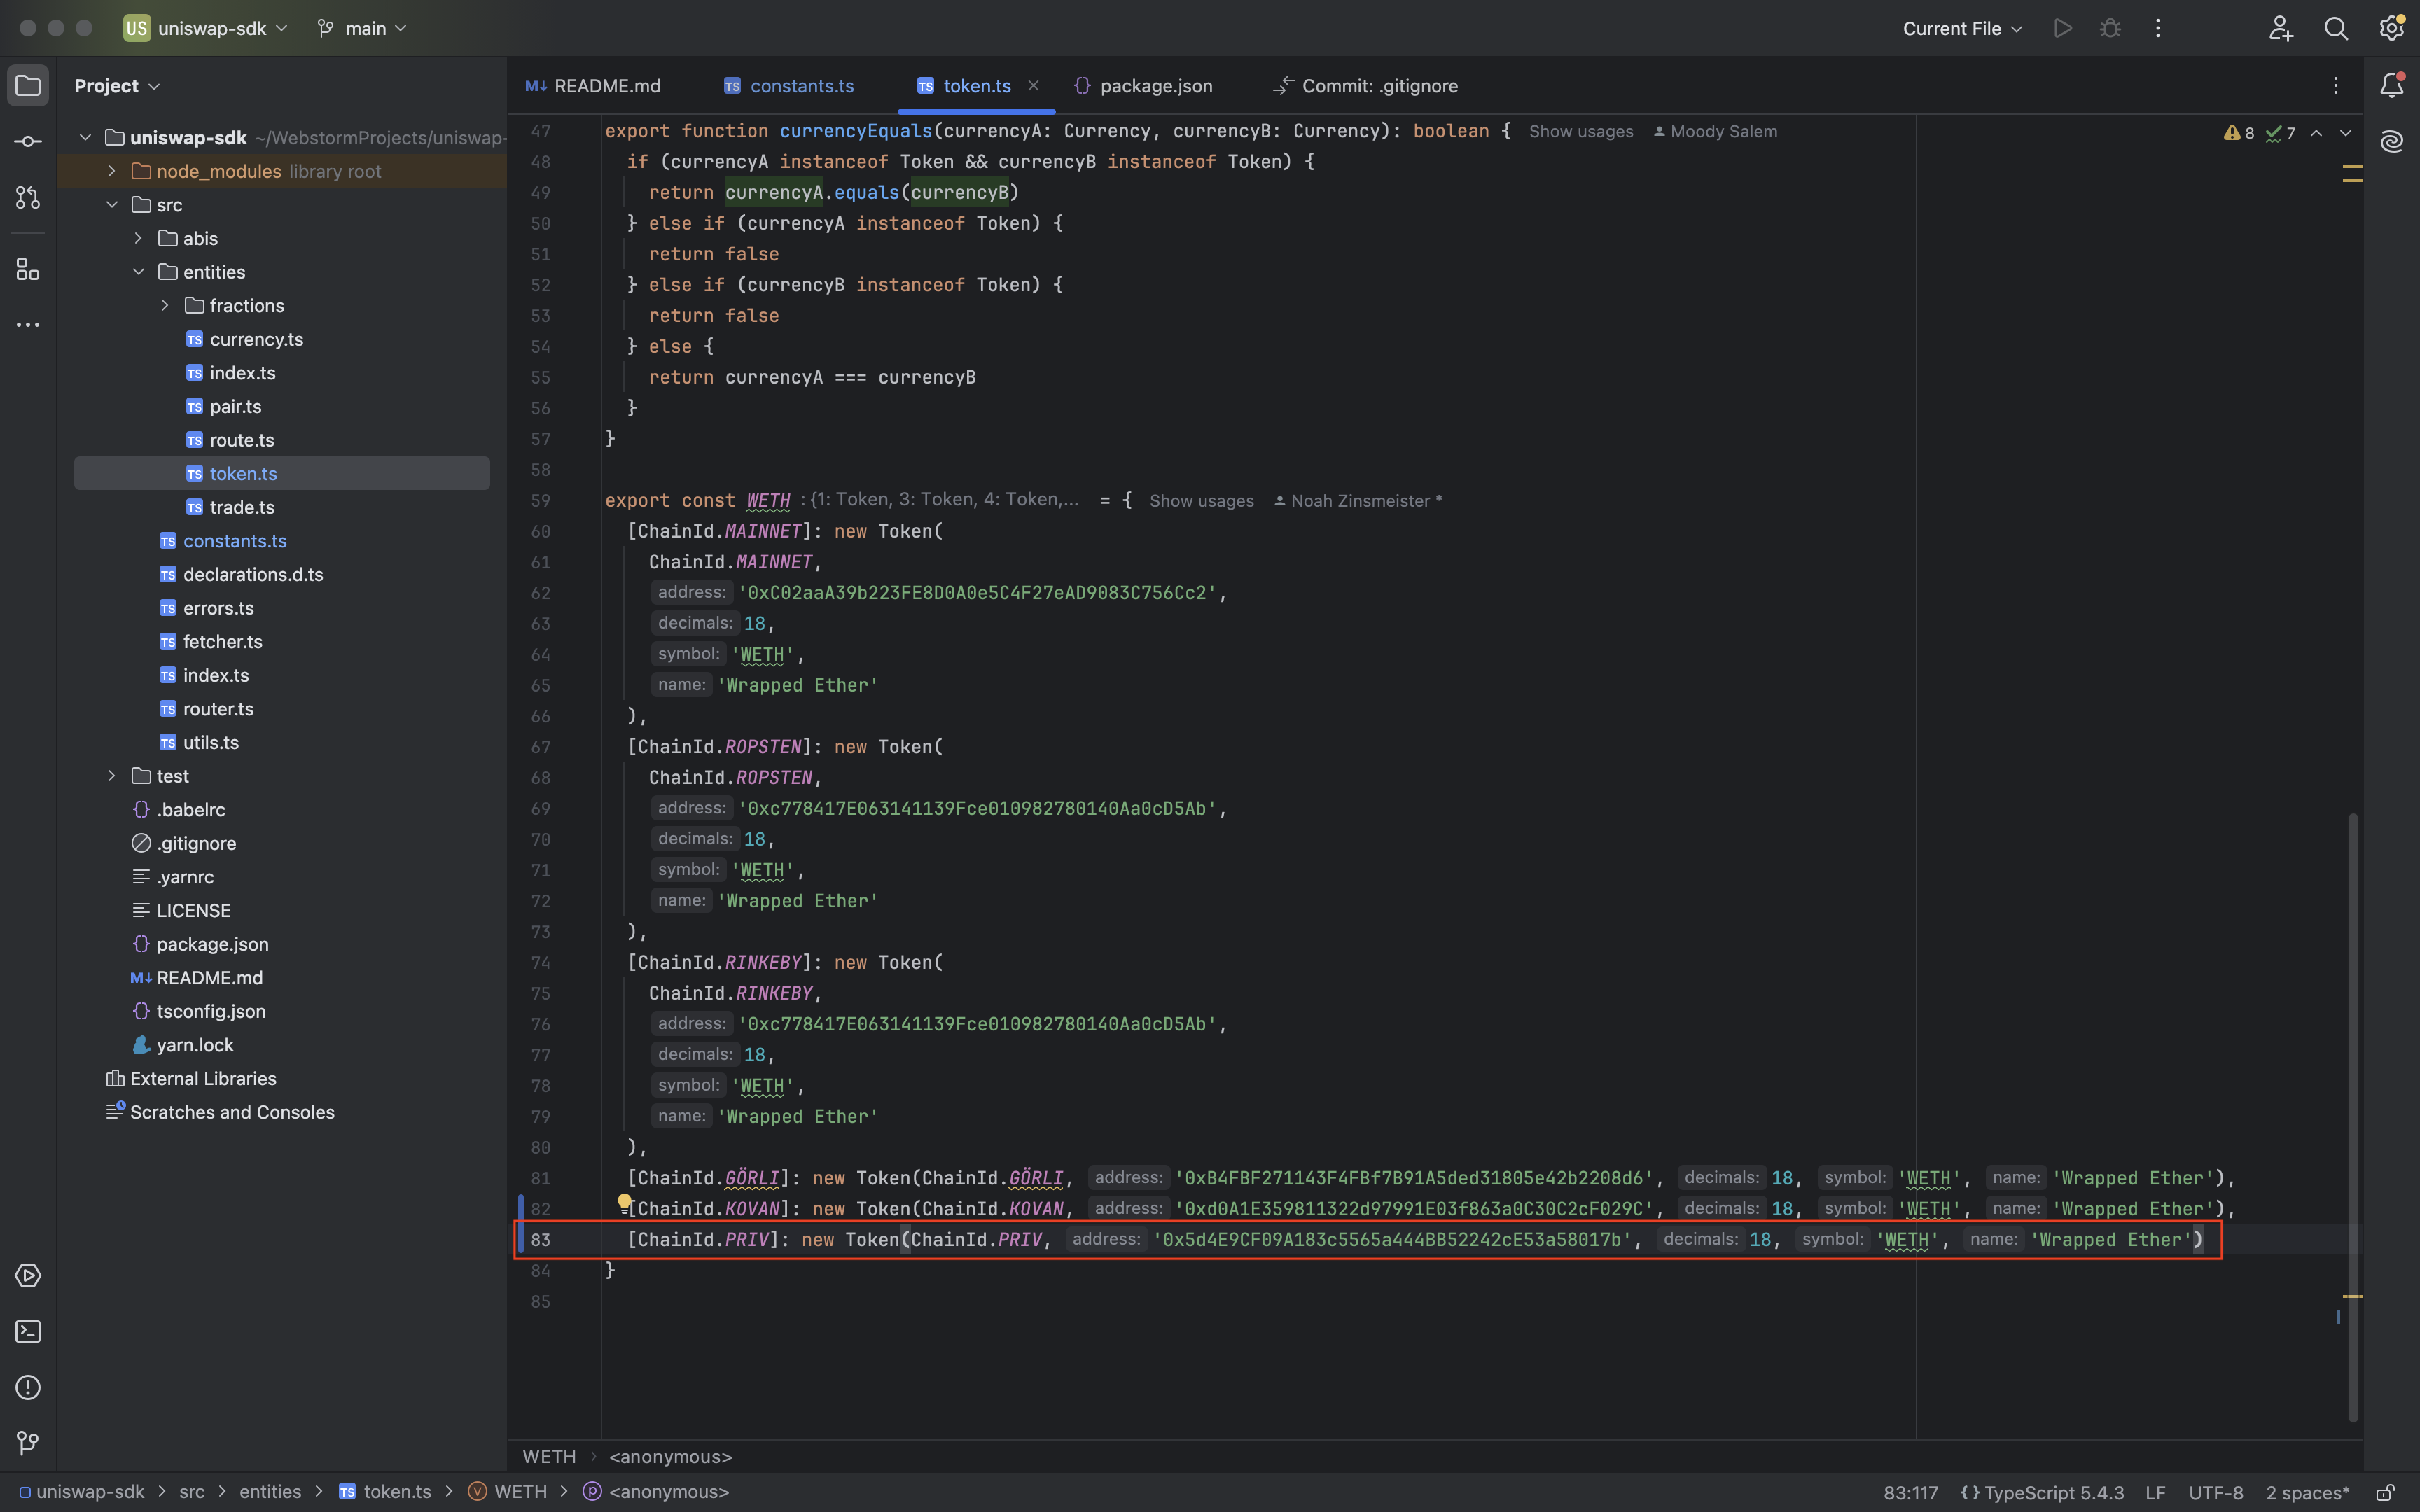
- 在
src/entities/token.ts中添加WETH合约地址:
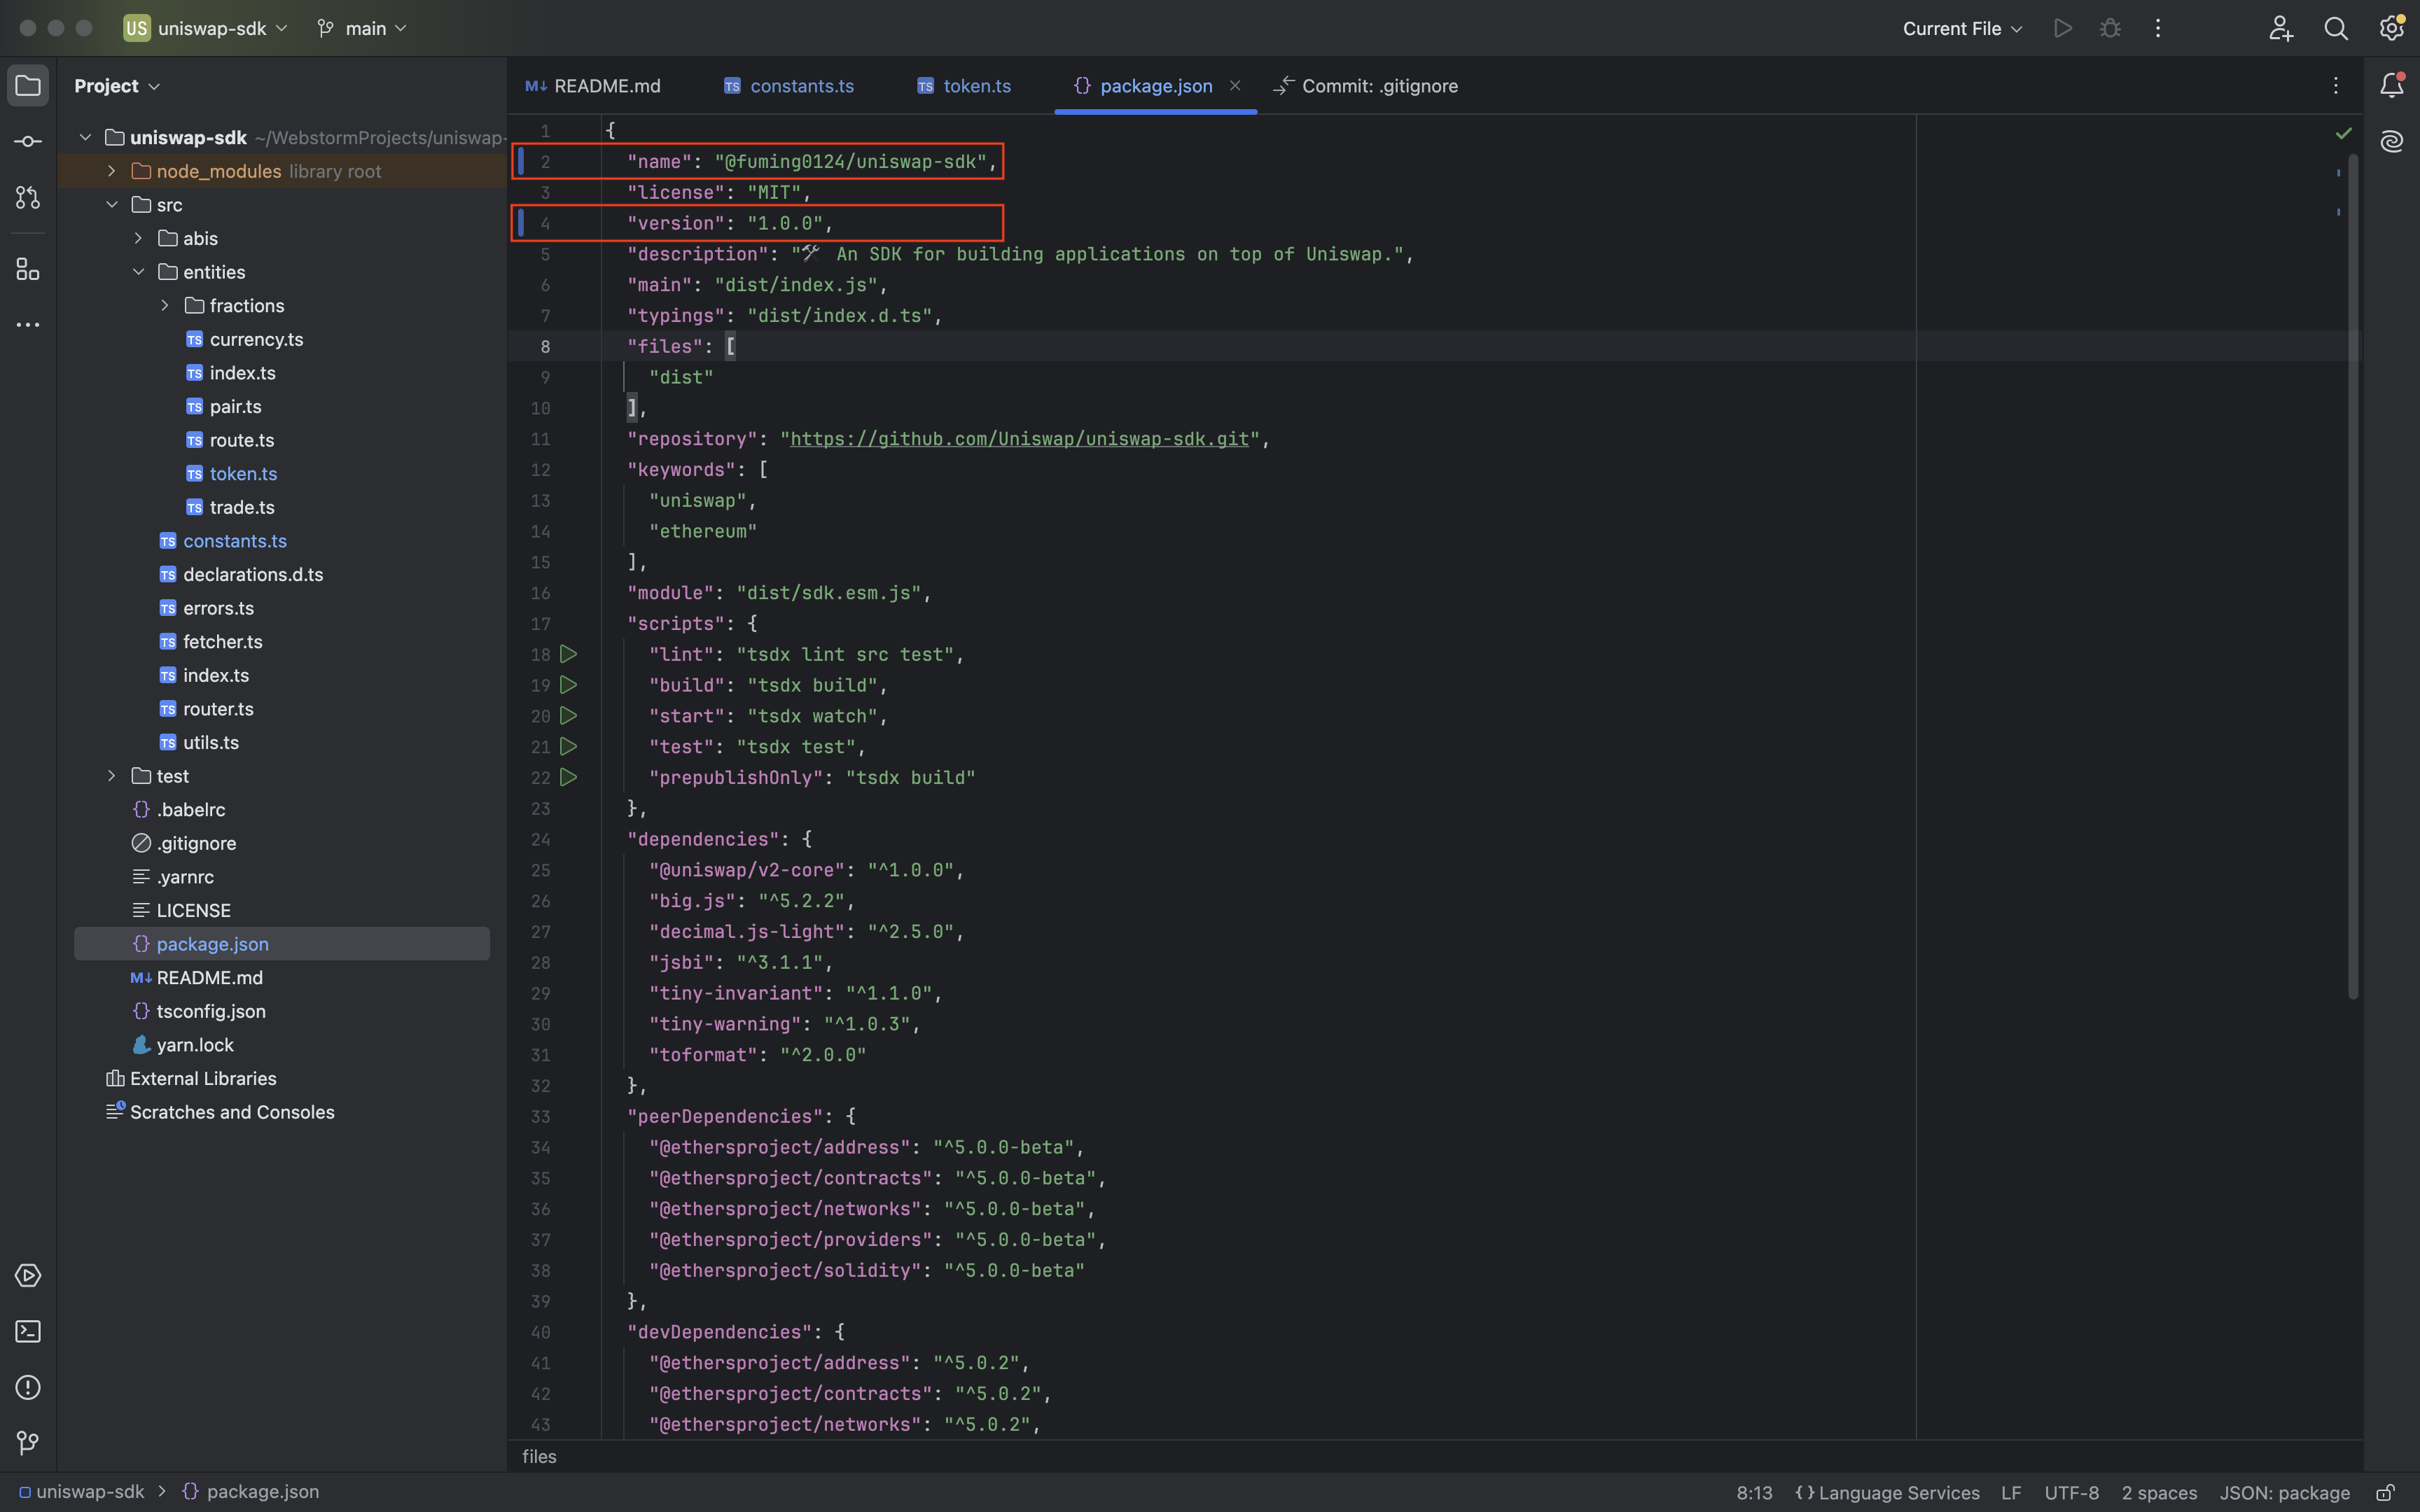
- 修改sdk的package.json,修改一下库的名称及版本:
- 安装tsdx和其他依赖:
npm install -g tsdx
npm install- 登陆并发布
npm login --registry=https://registry.npmjs.org/
npm publish --registry=https://registry.npmjs.org/ --access=public
修改interface
下载interface v3.2.20代码:https://github.com/Uniswap/interface/releases/tag/v3.2.20
- 修改
package.json,添加我们自己的sdk库信息
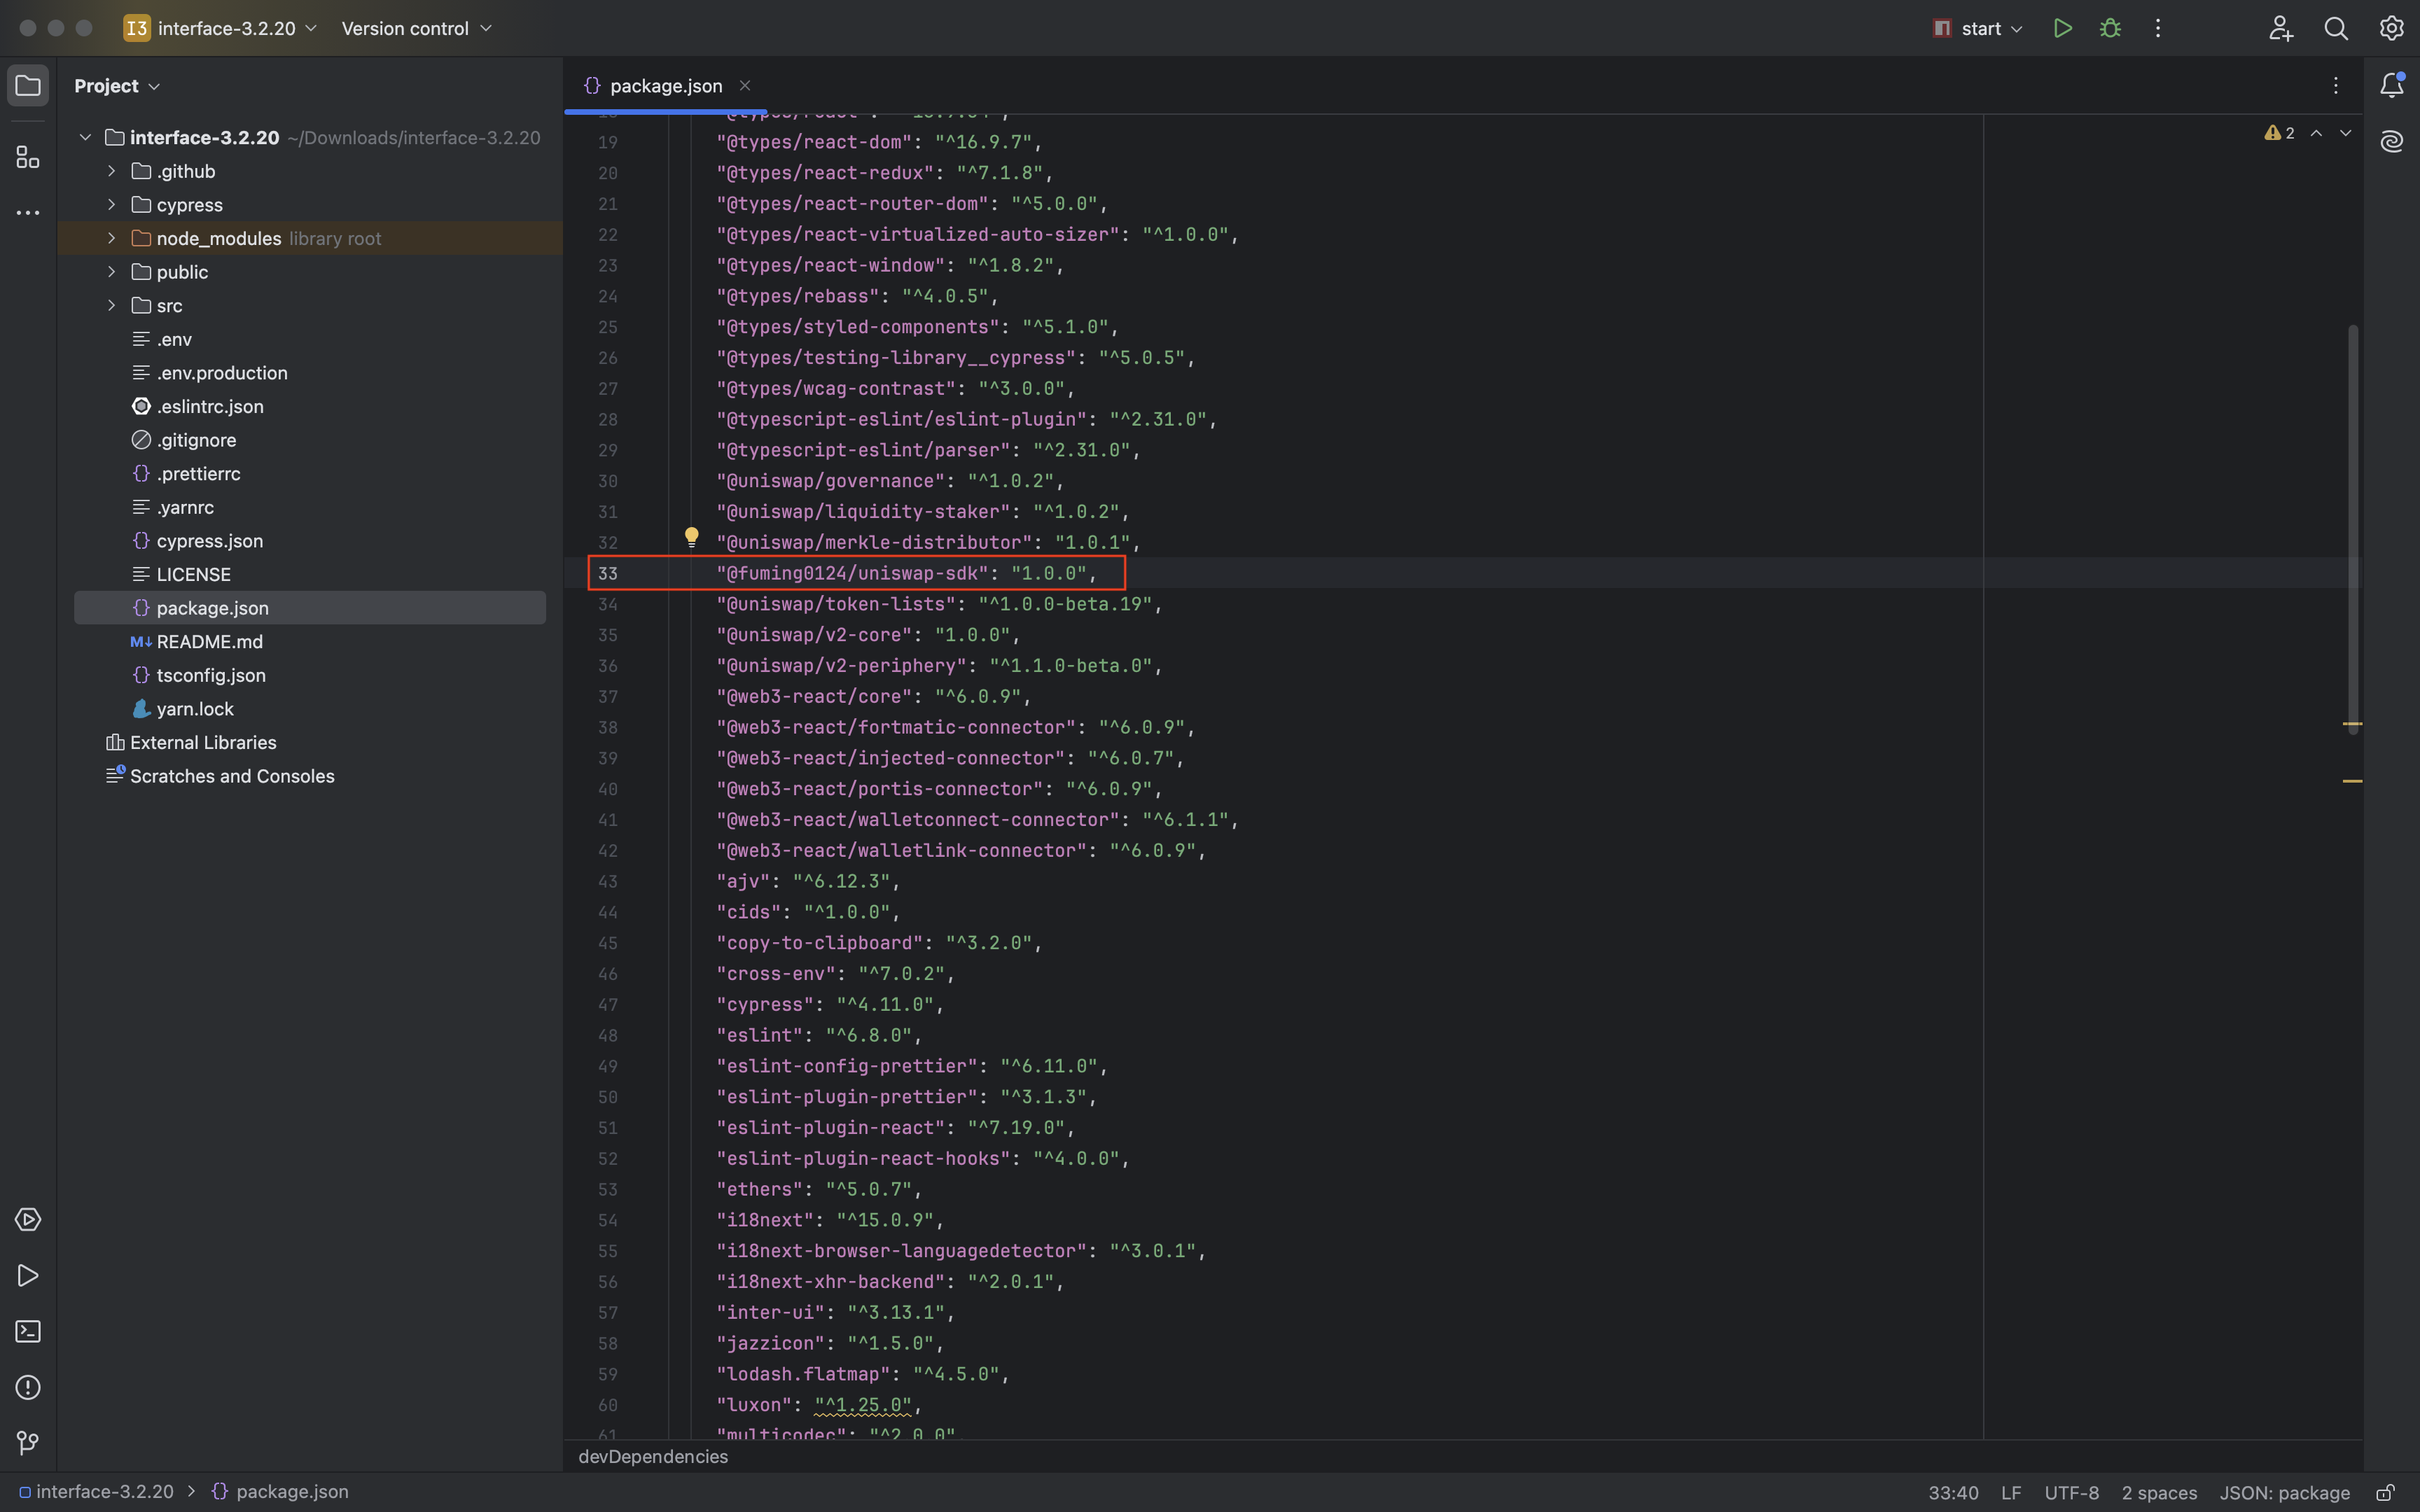
- 全局替换
@uniswap/sdk为我们自己的库名称:

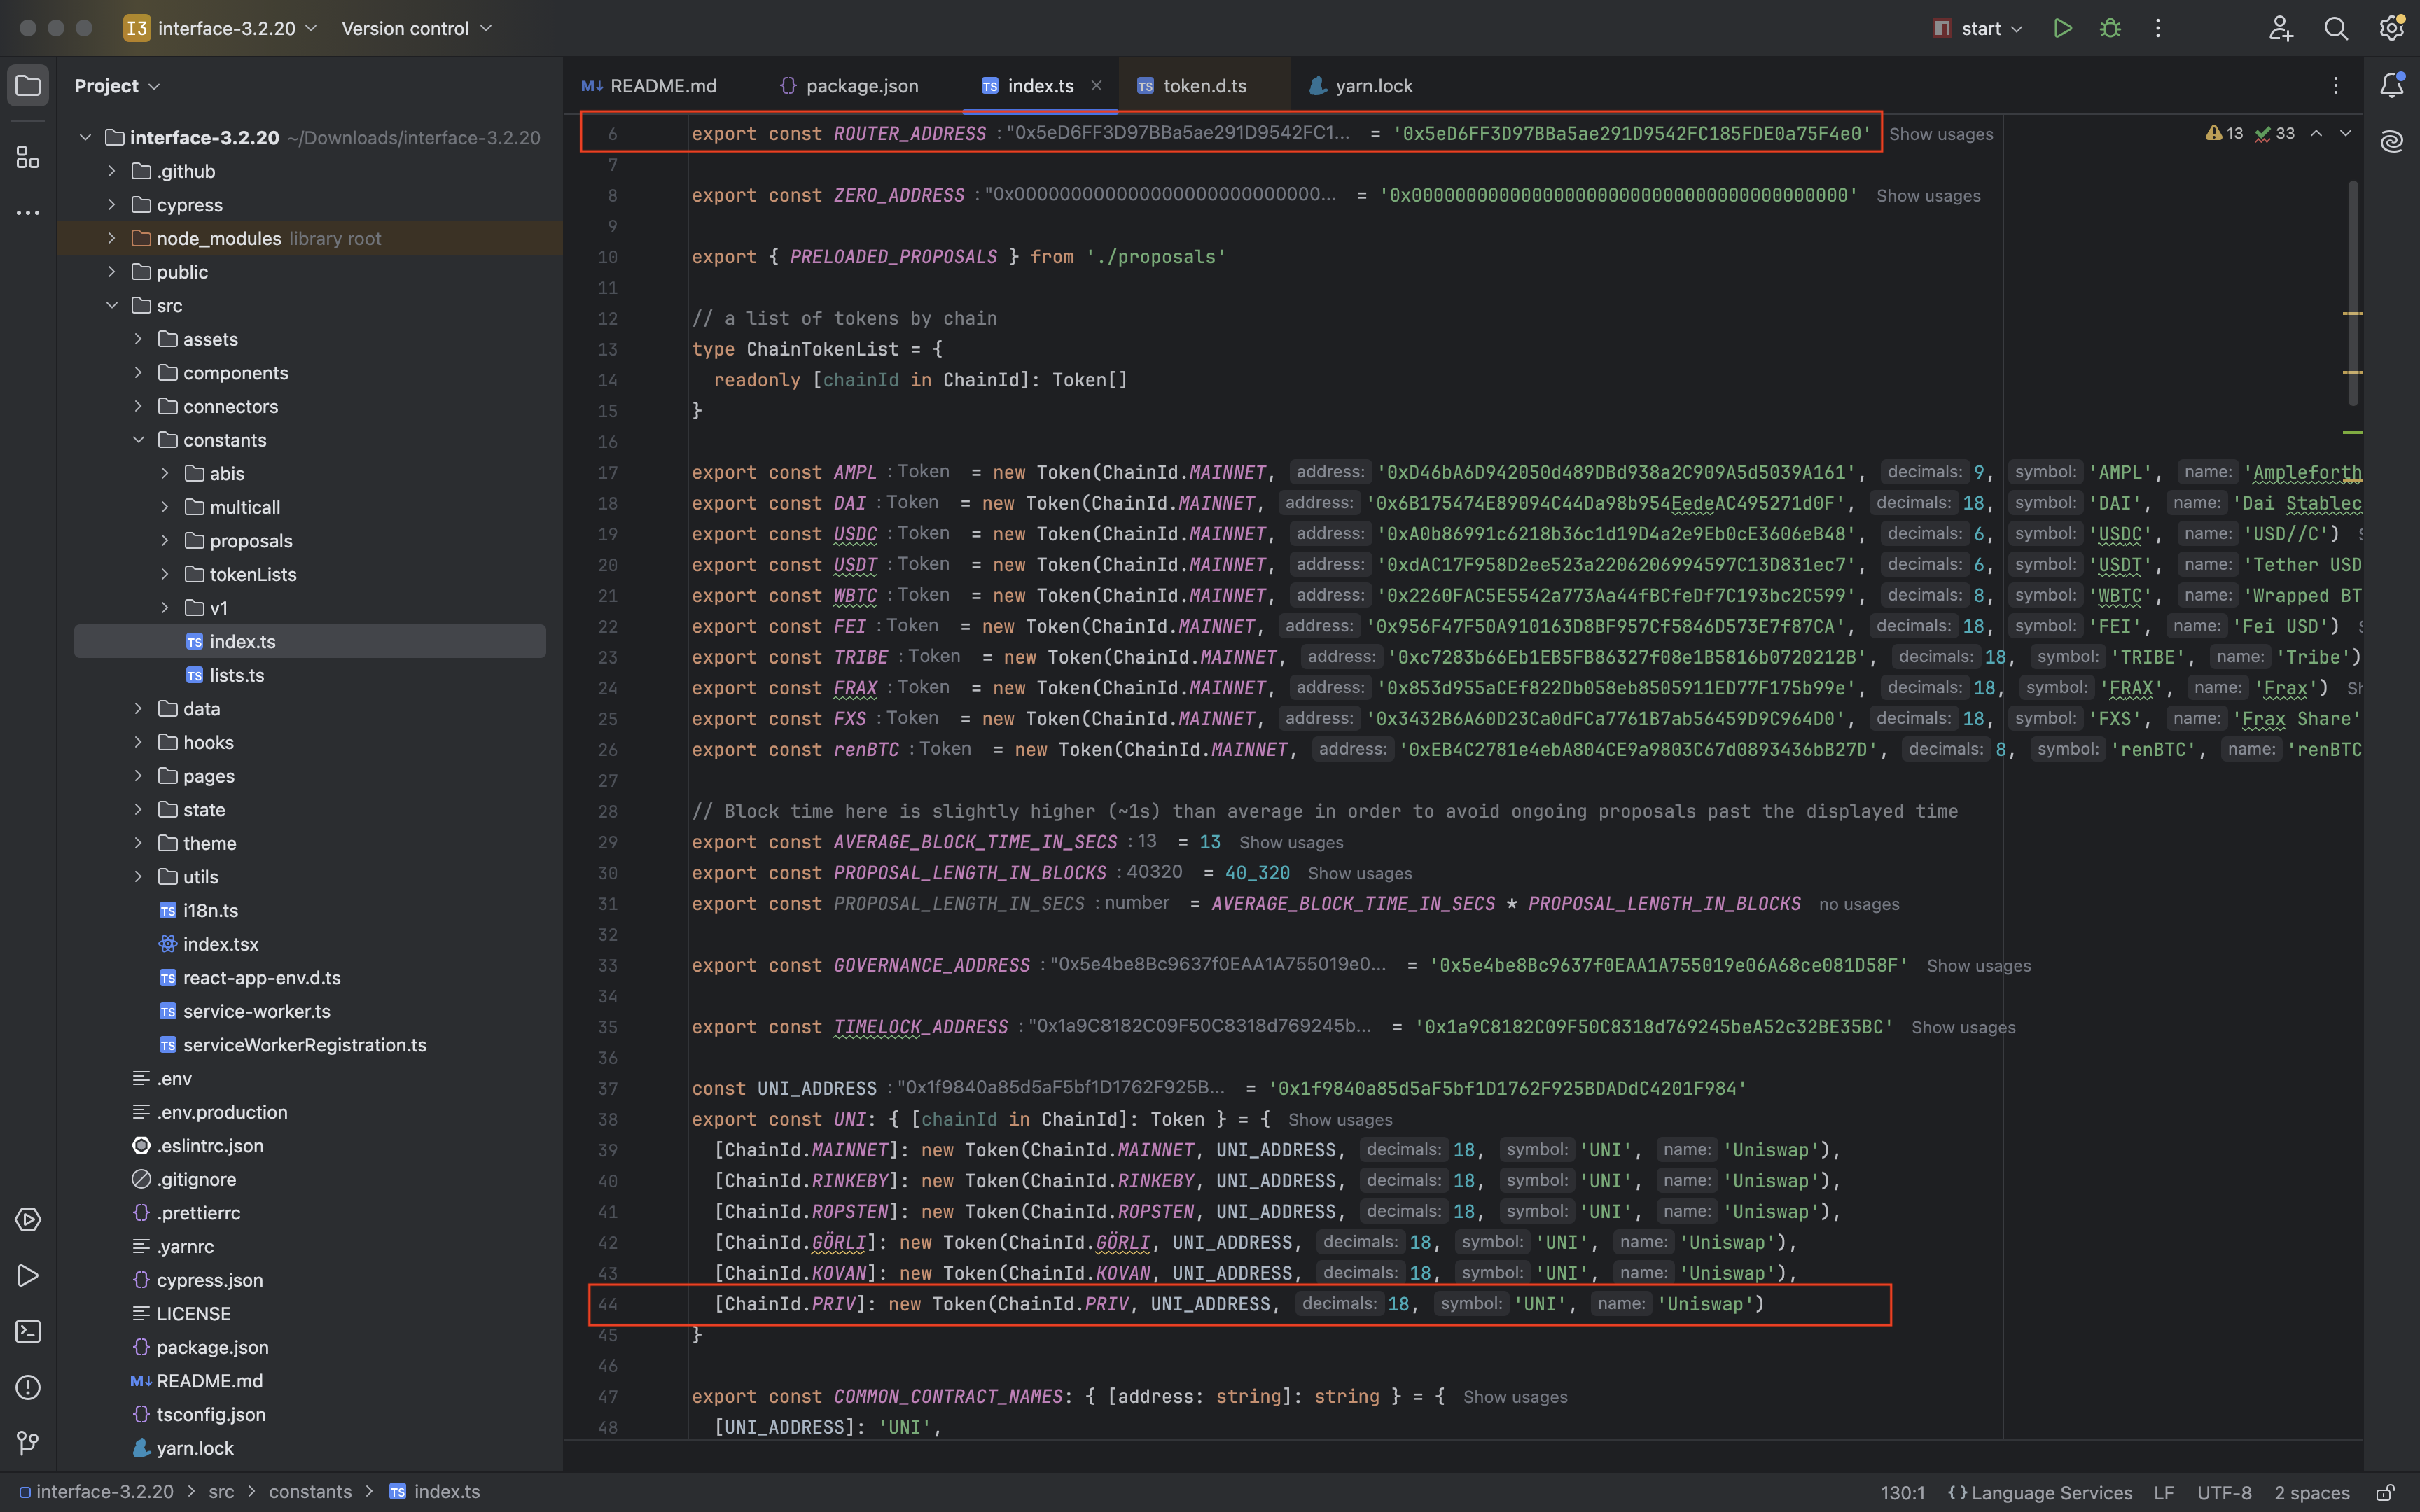
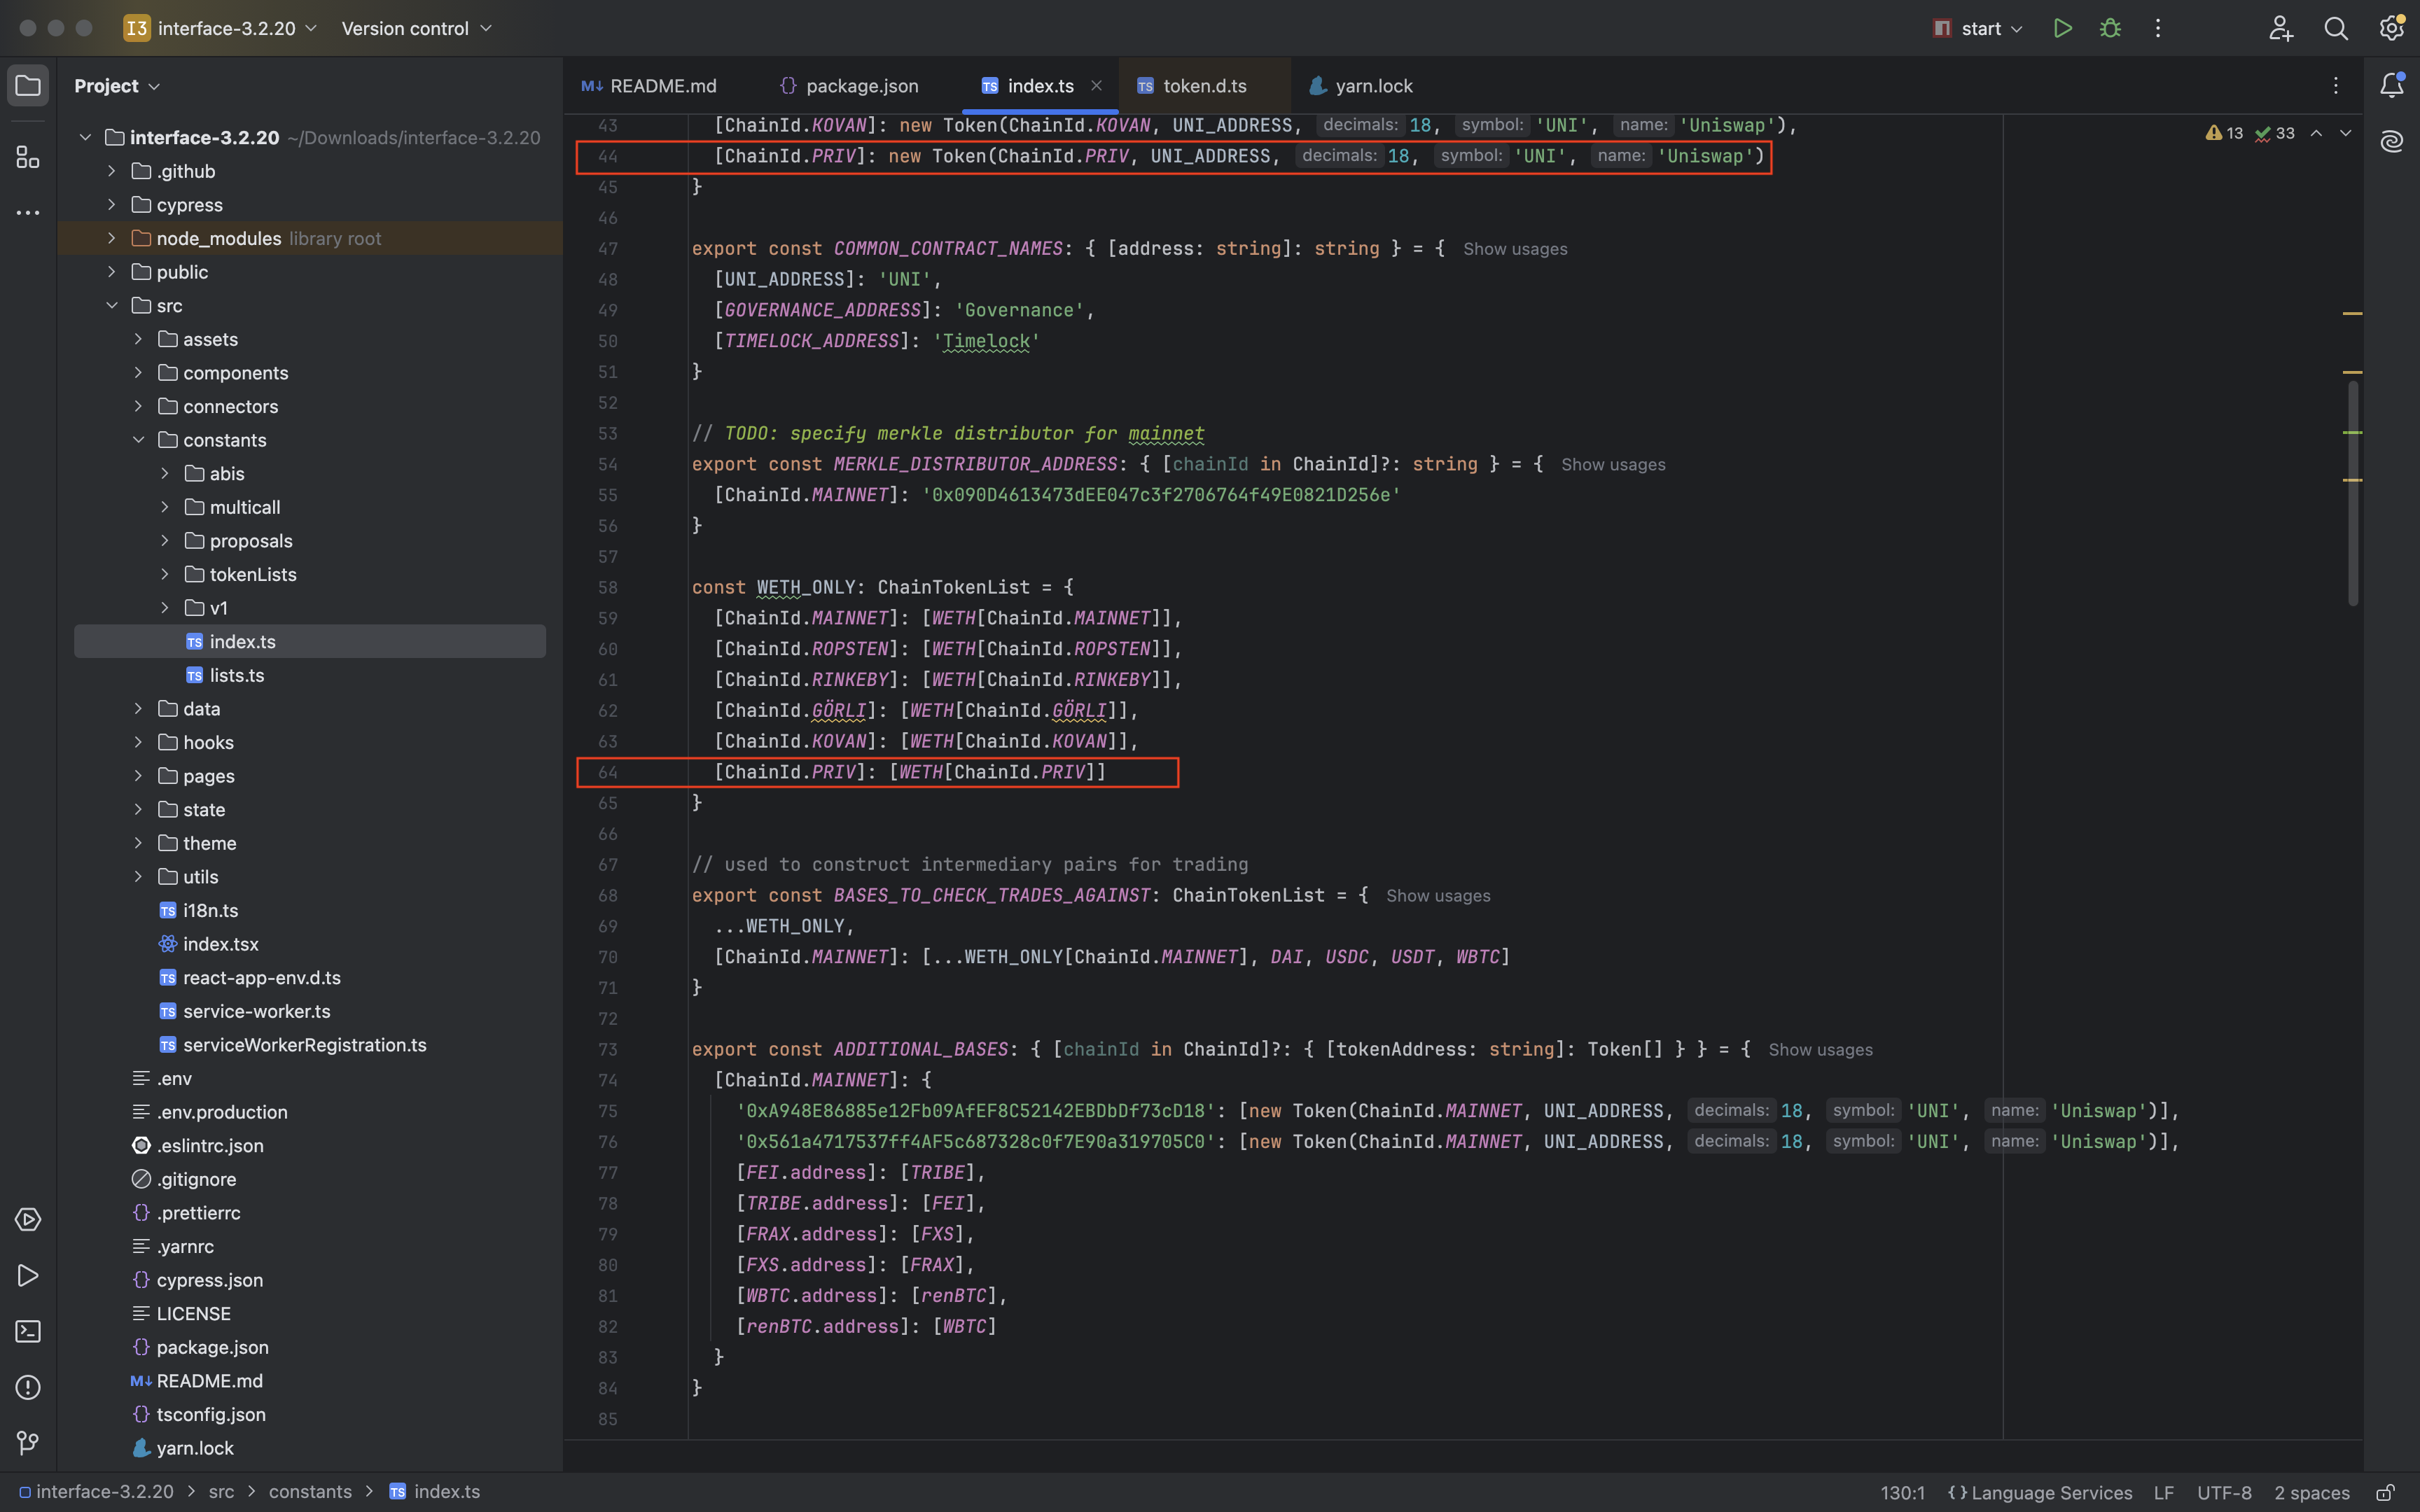
- 修改
src/constants/index.ts中修改路由合约地址ROUTER_ADDRESS,并添加链名:
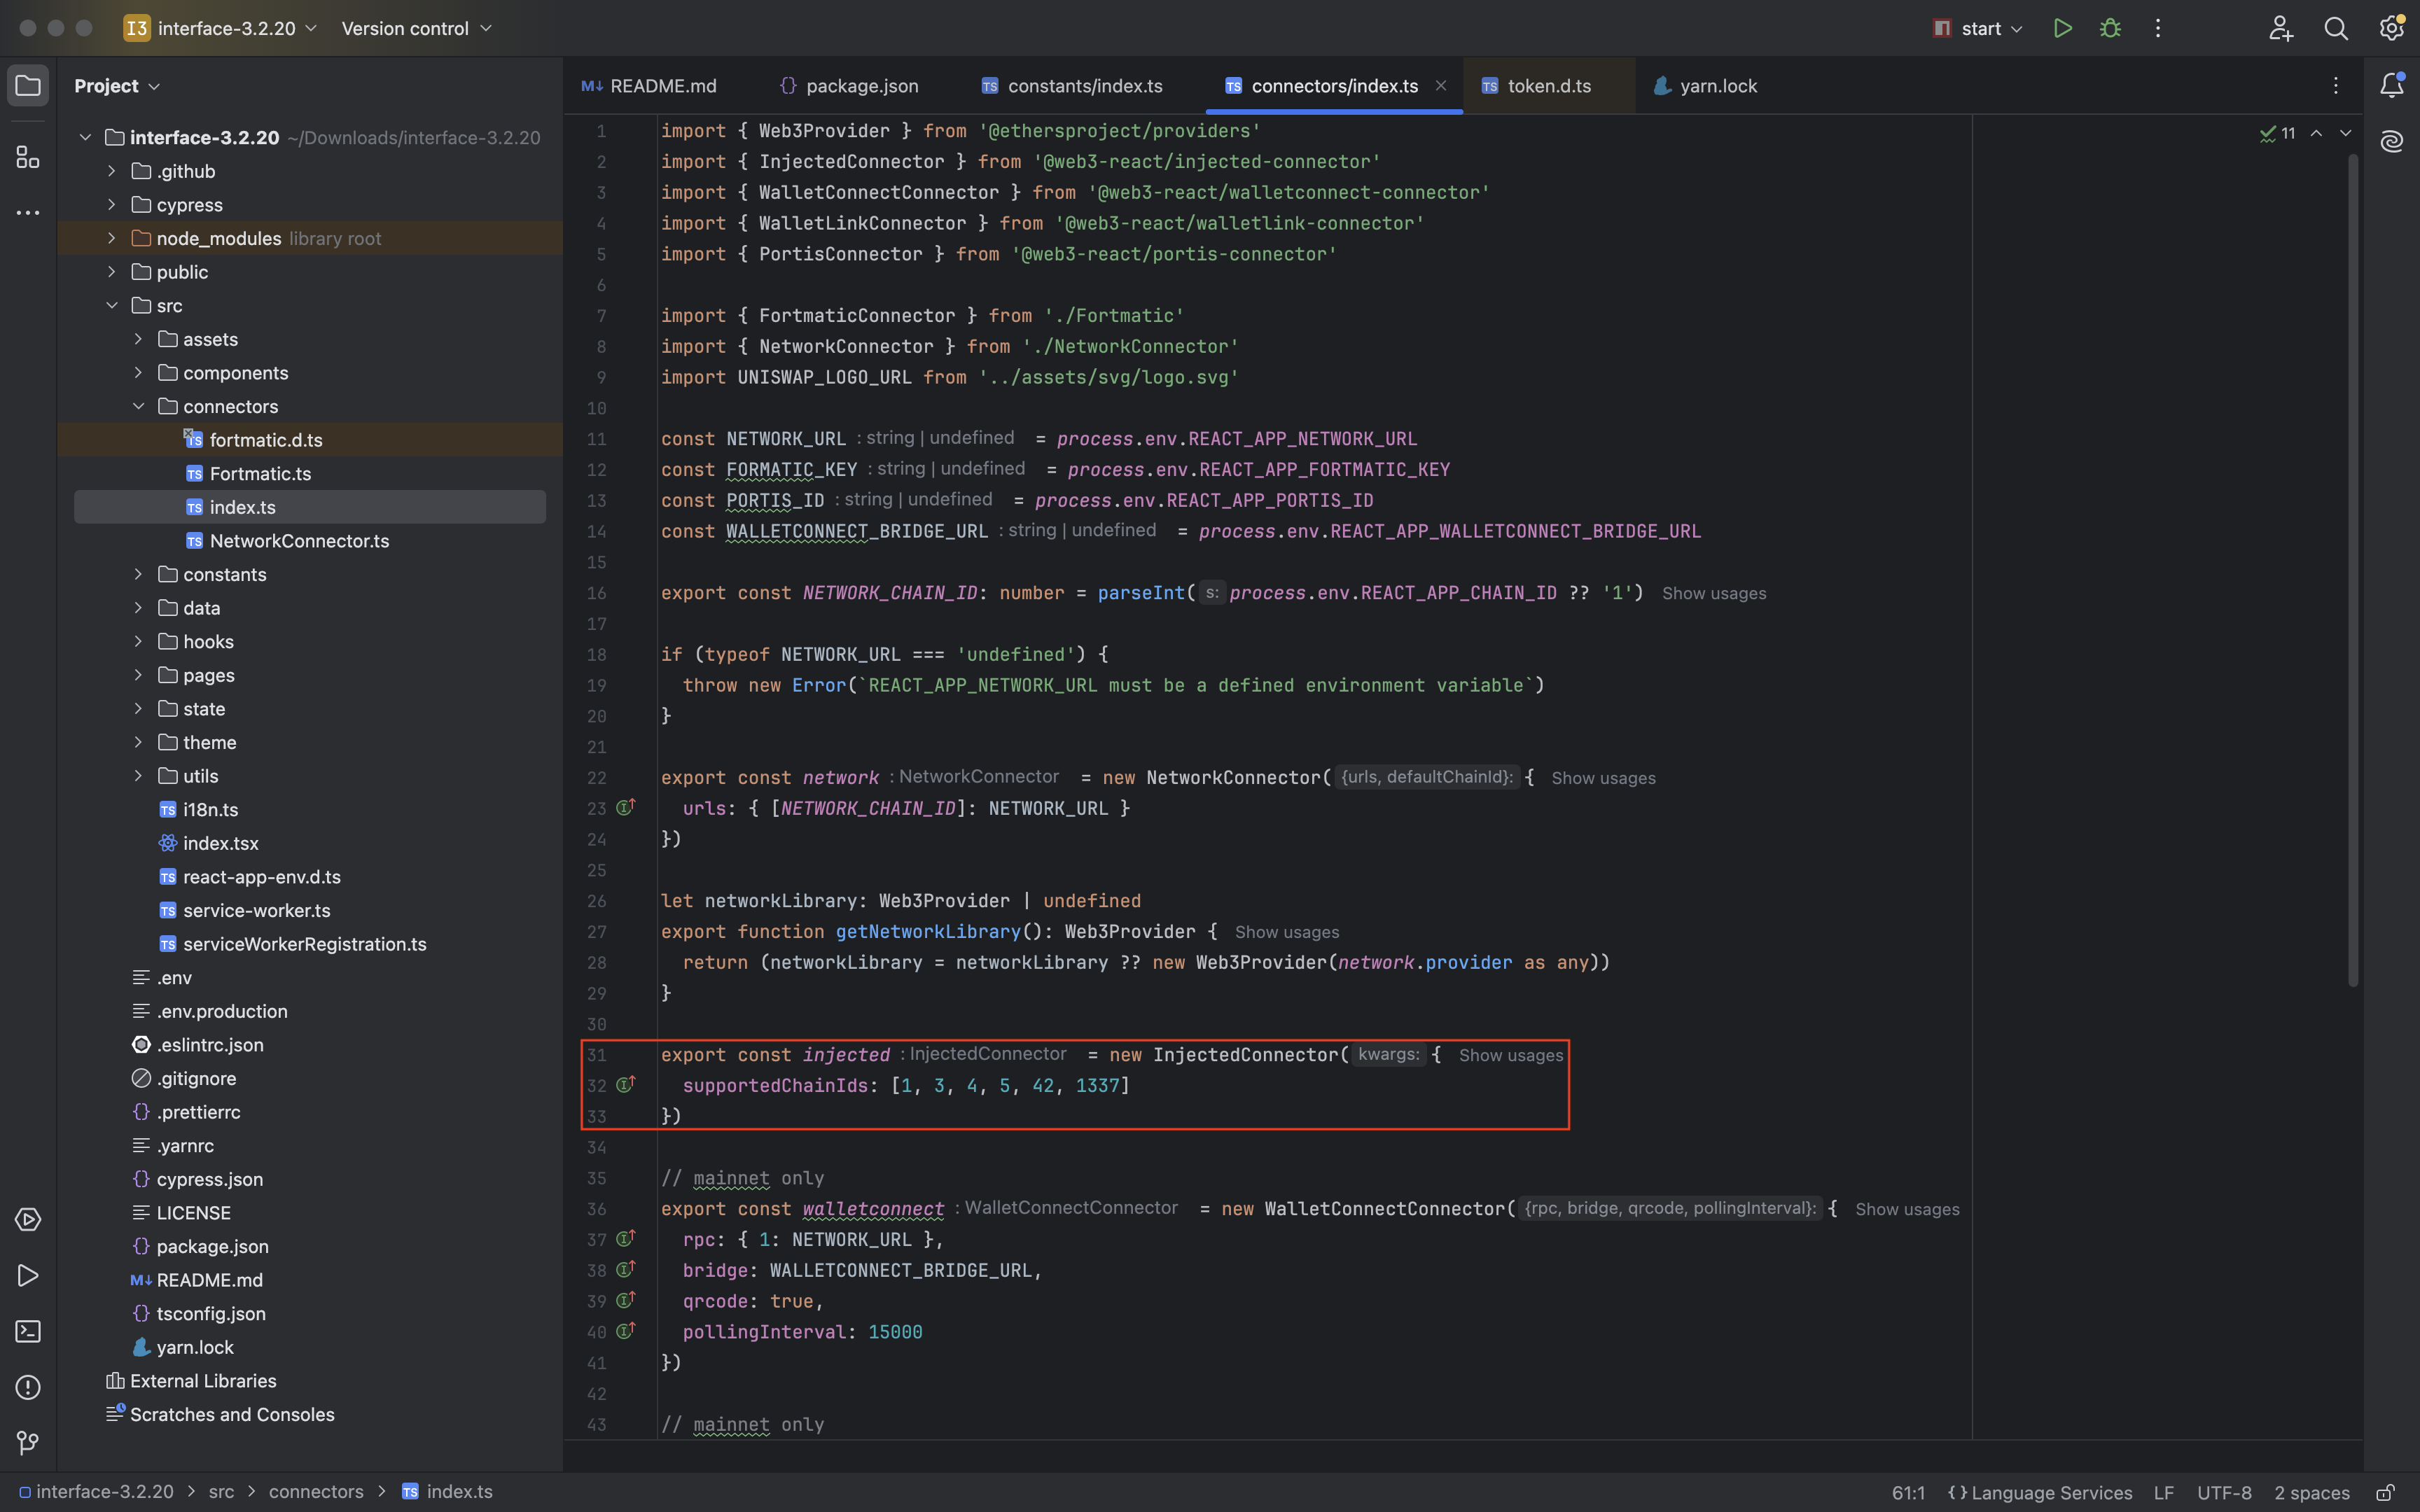
- 在
src/connectors/index.ts中添加支持的链id:
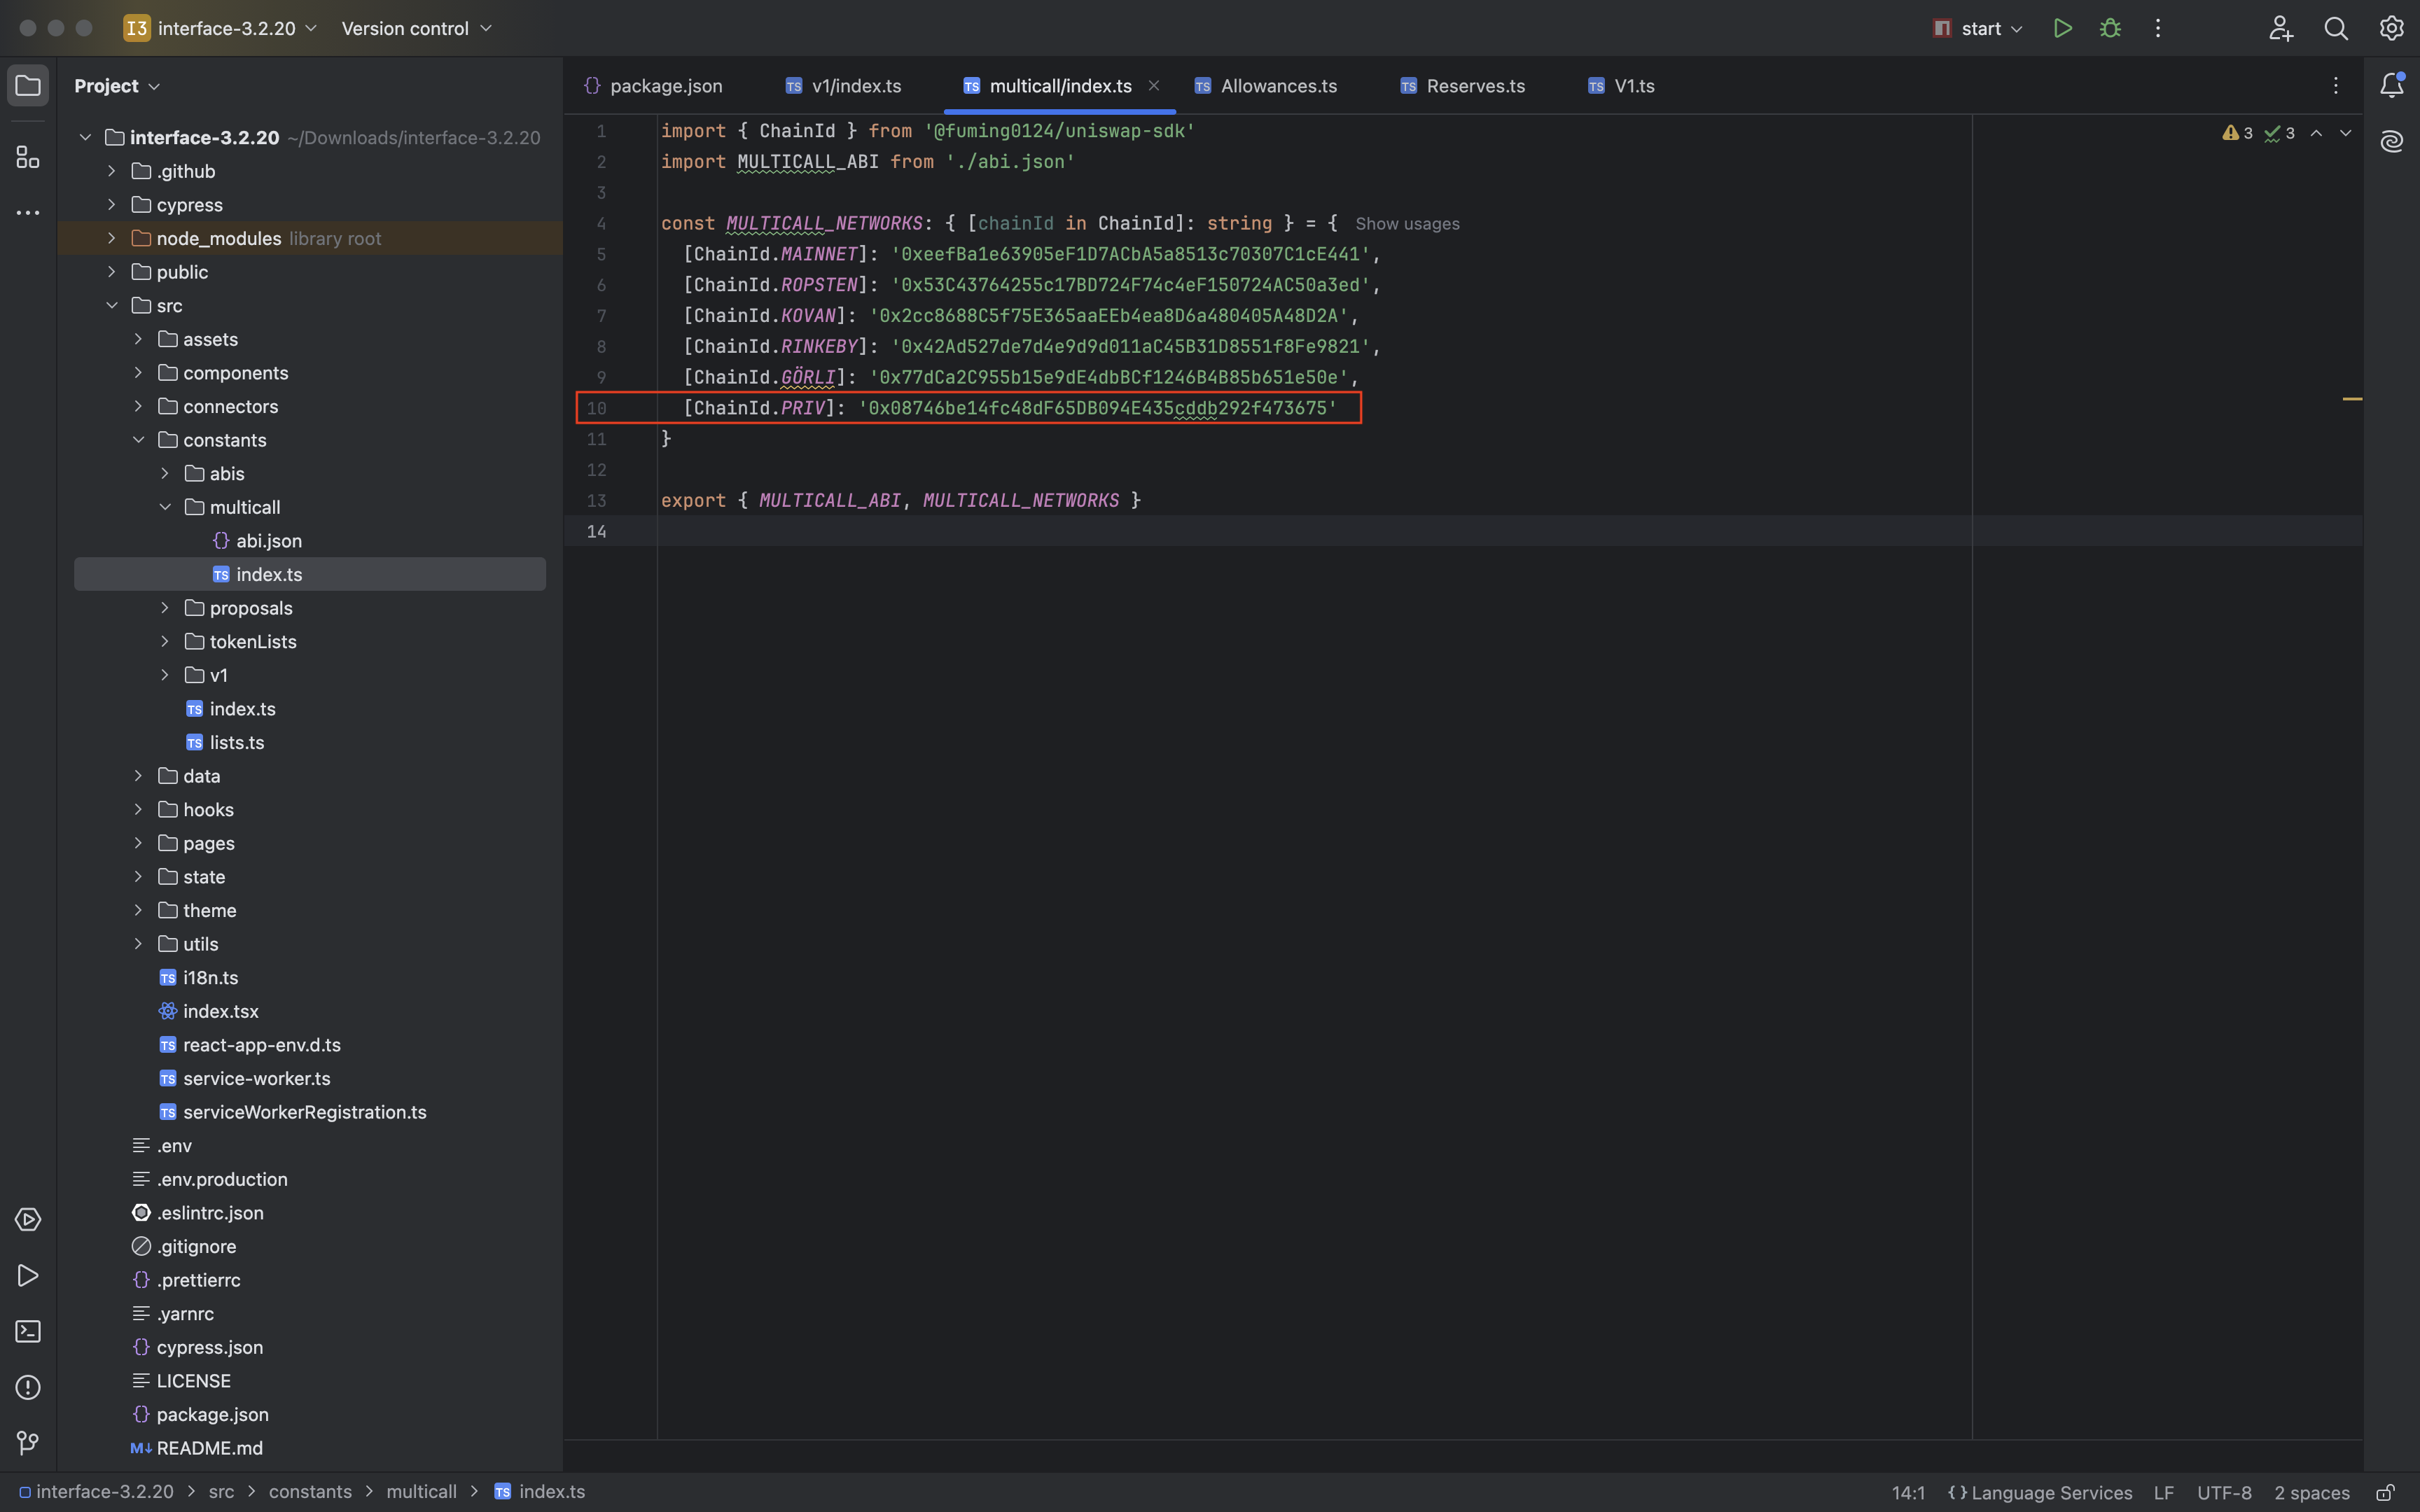
- 在
src/constants/multicall/index.tx中添加multicall地址:
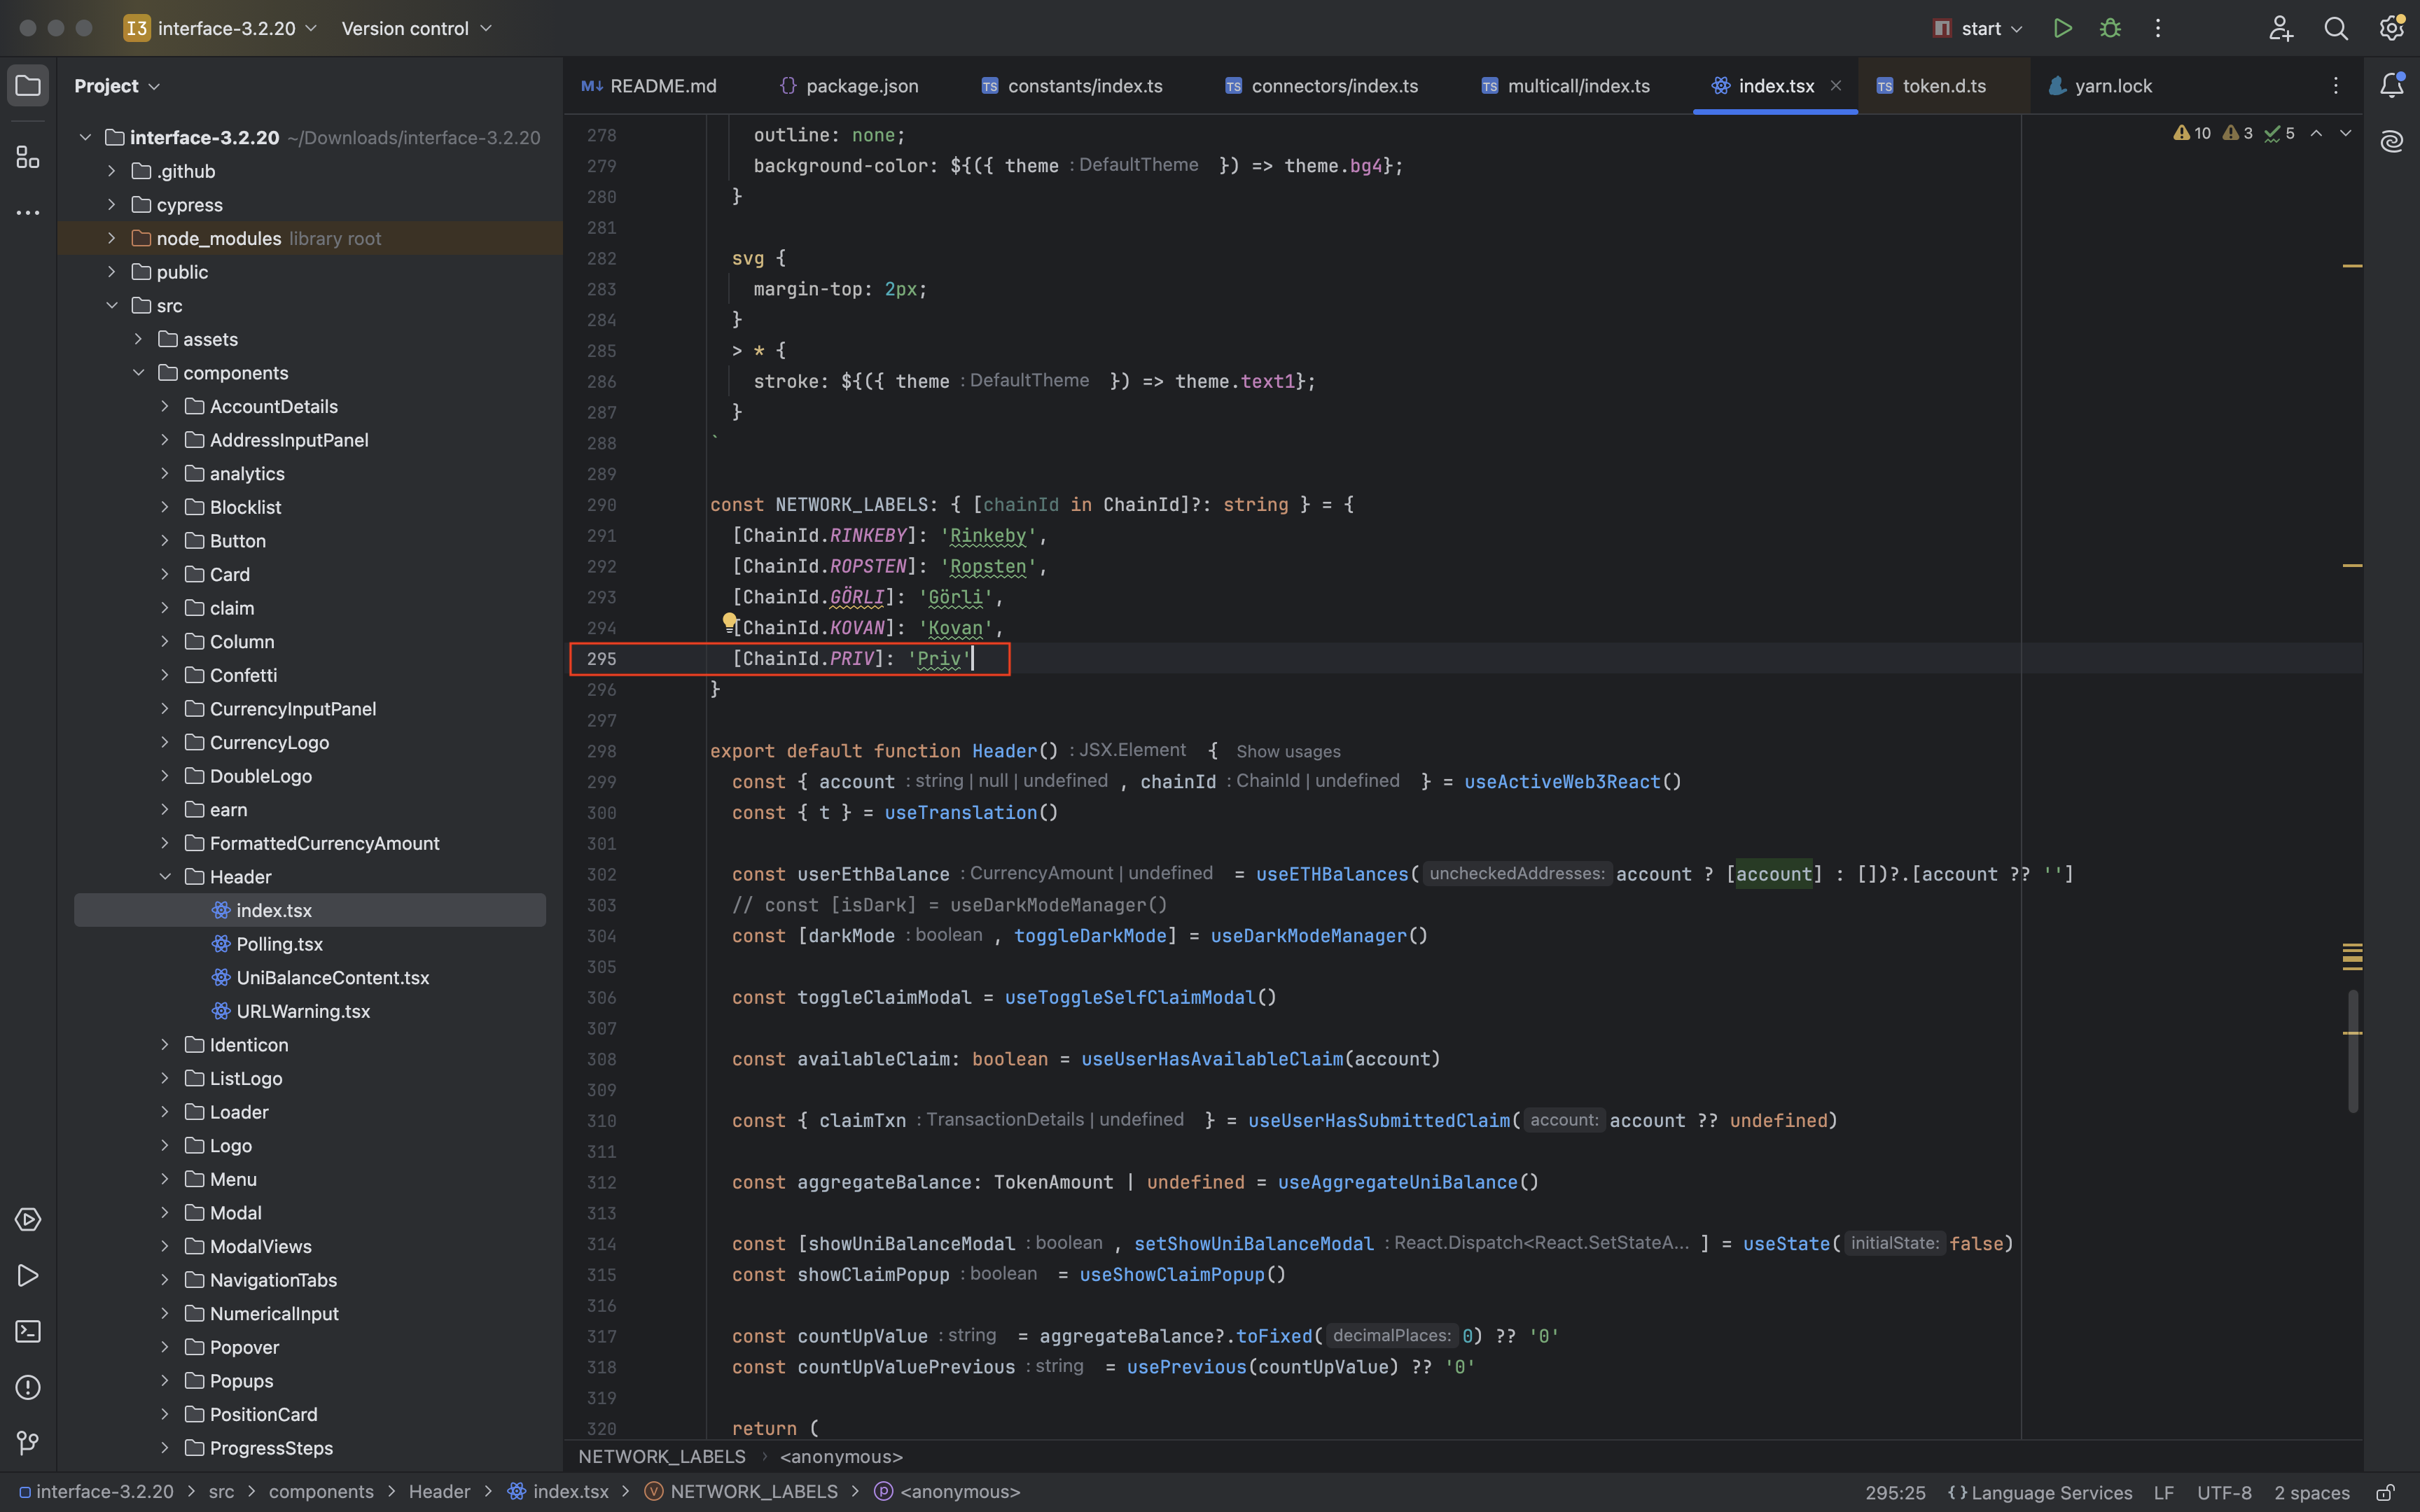
- 在
src/componets/Header/index.tsx中添加NETWORK_LABELS:
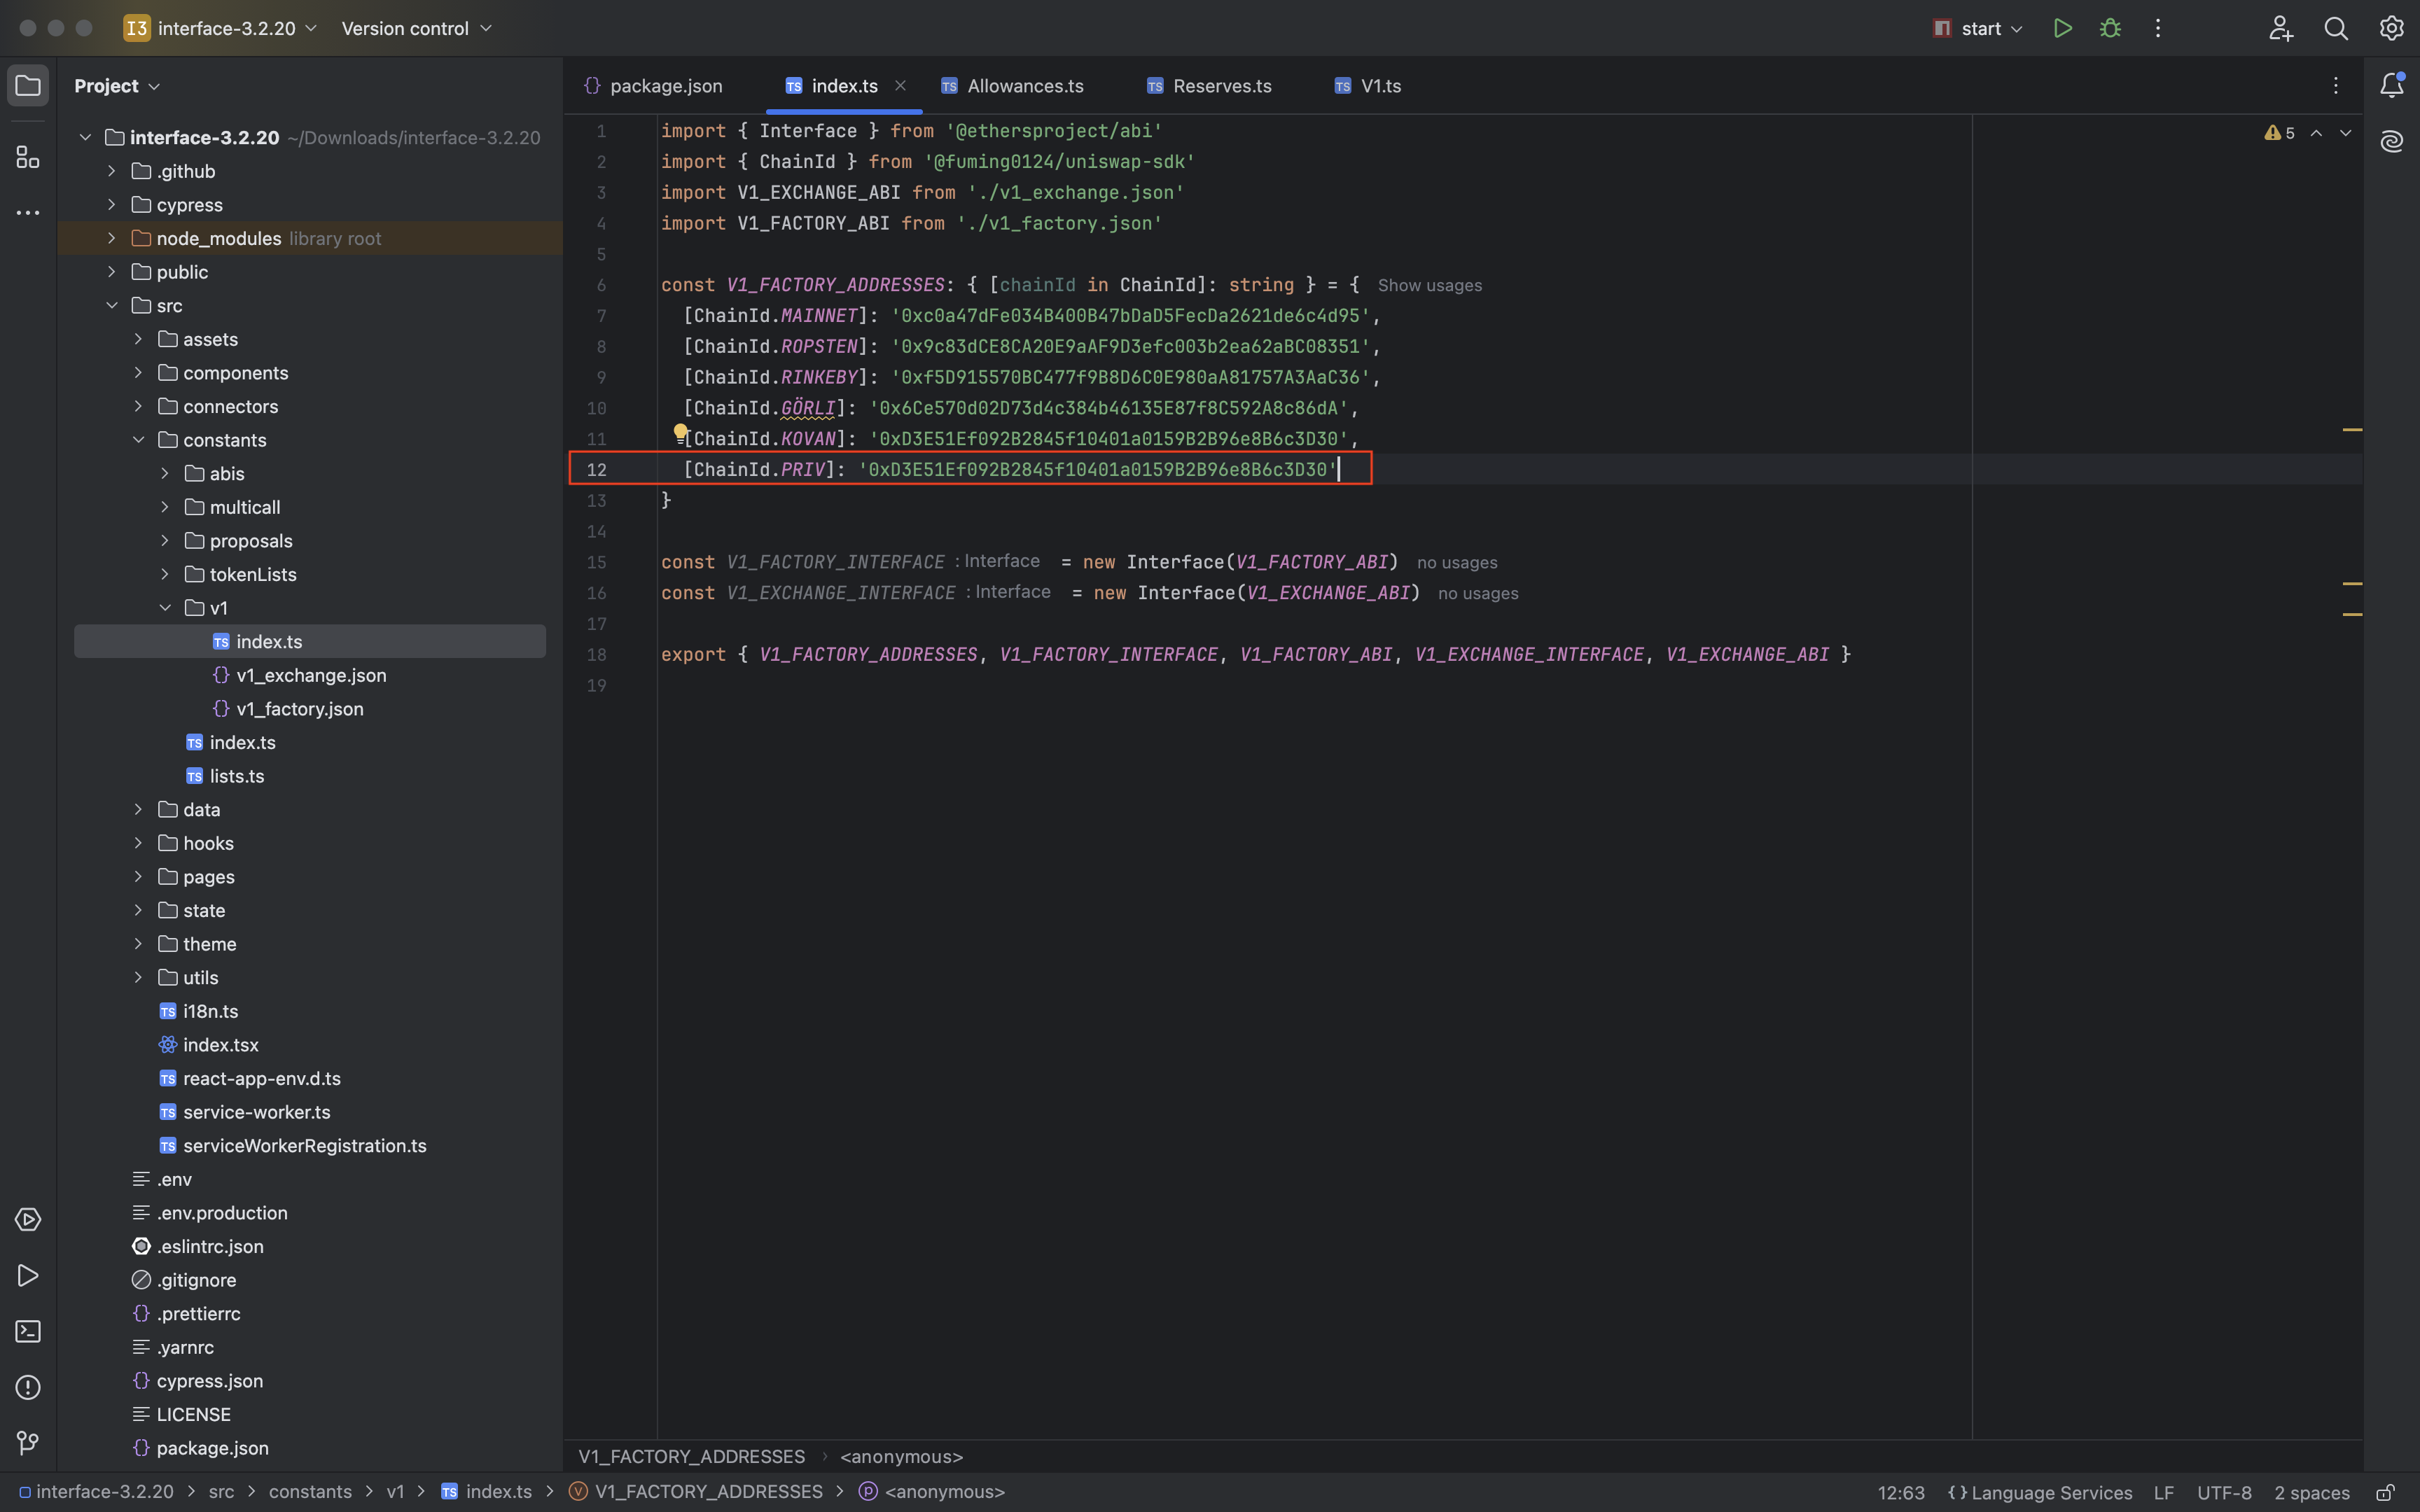
- 在
src/constants/v1/index.ts中添加V1_FACTORY_ADDRESSES,我们并未使用v1,随便写一个不存在的地址:
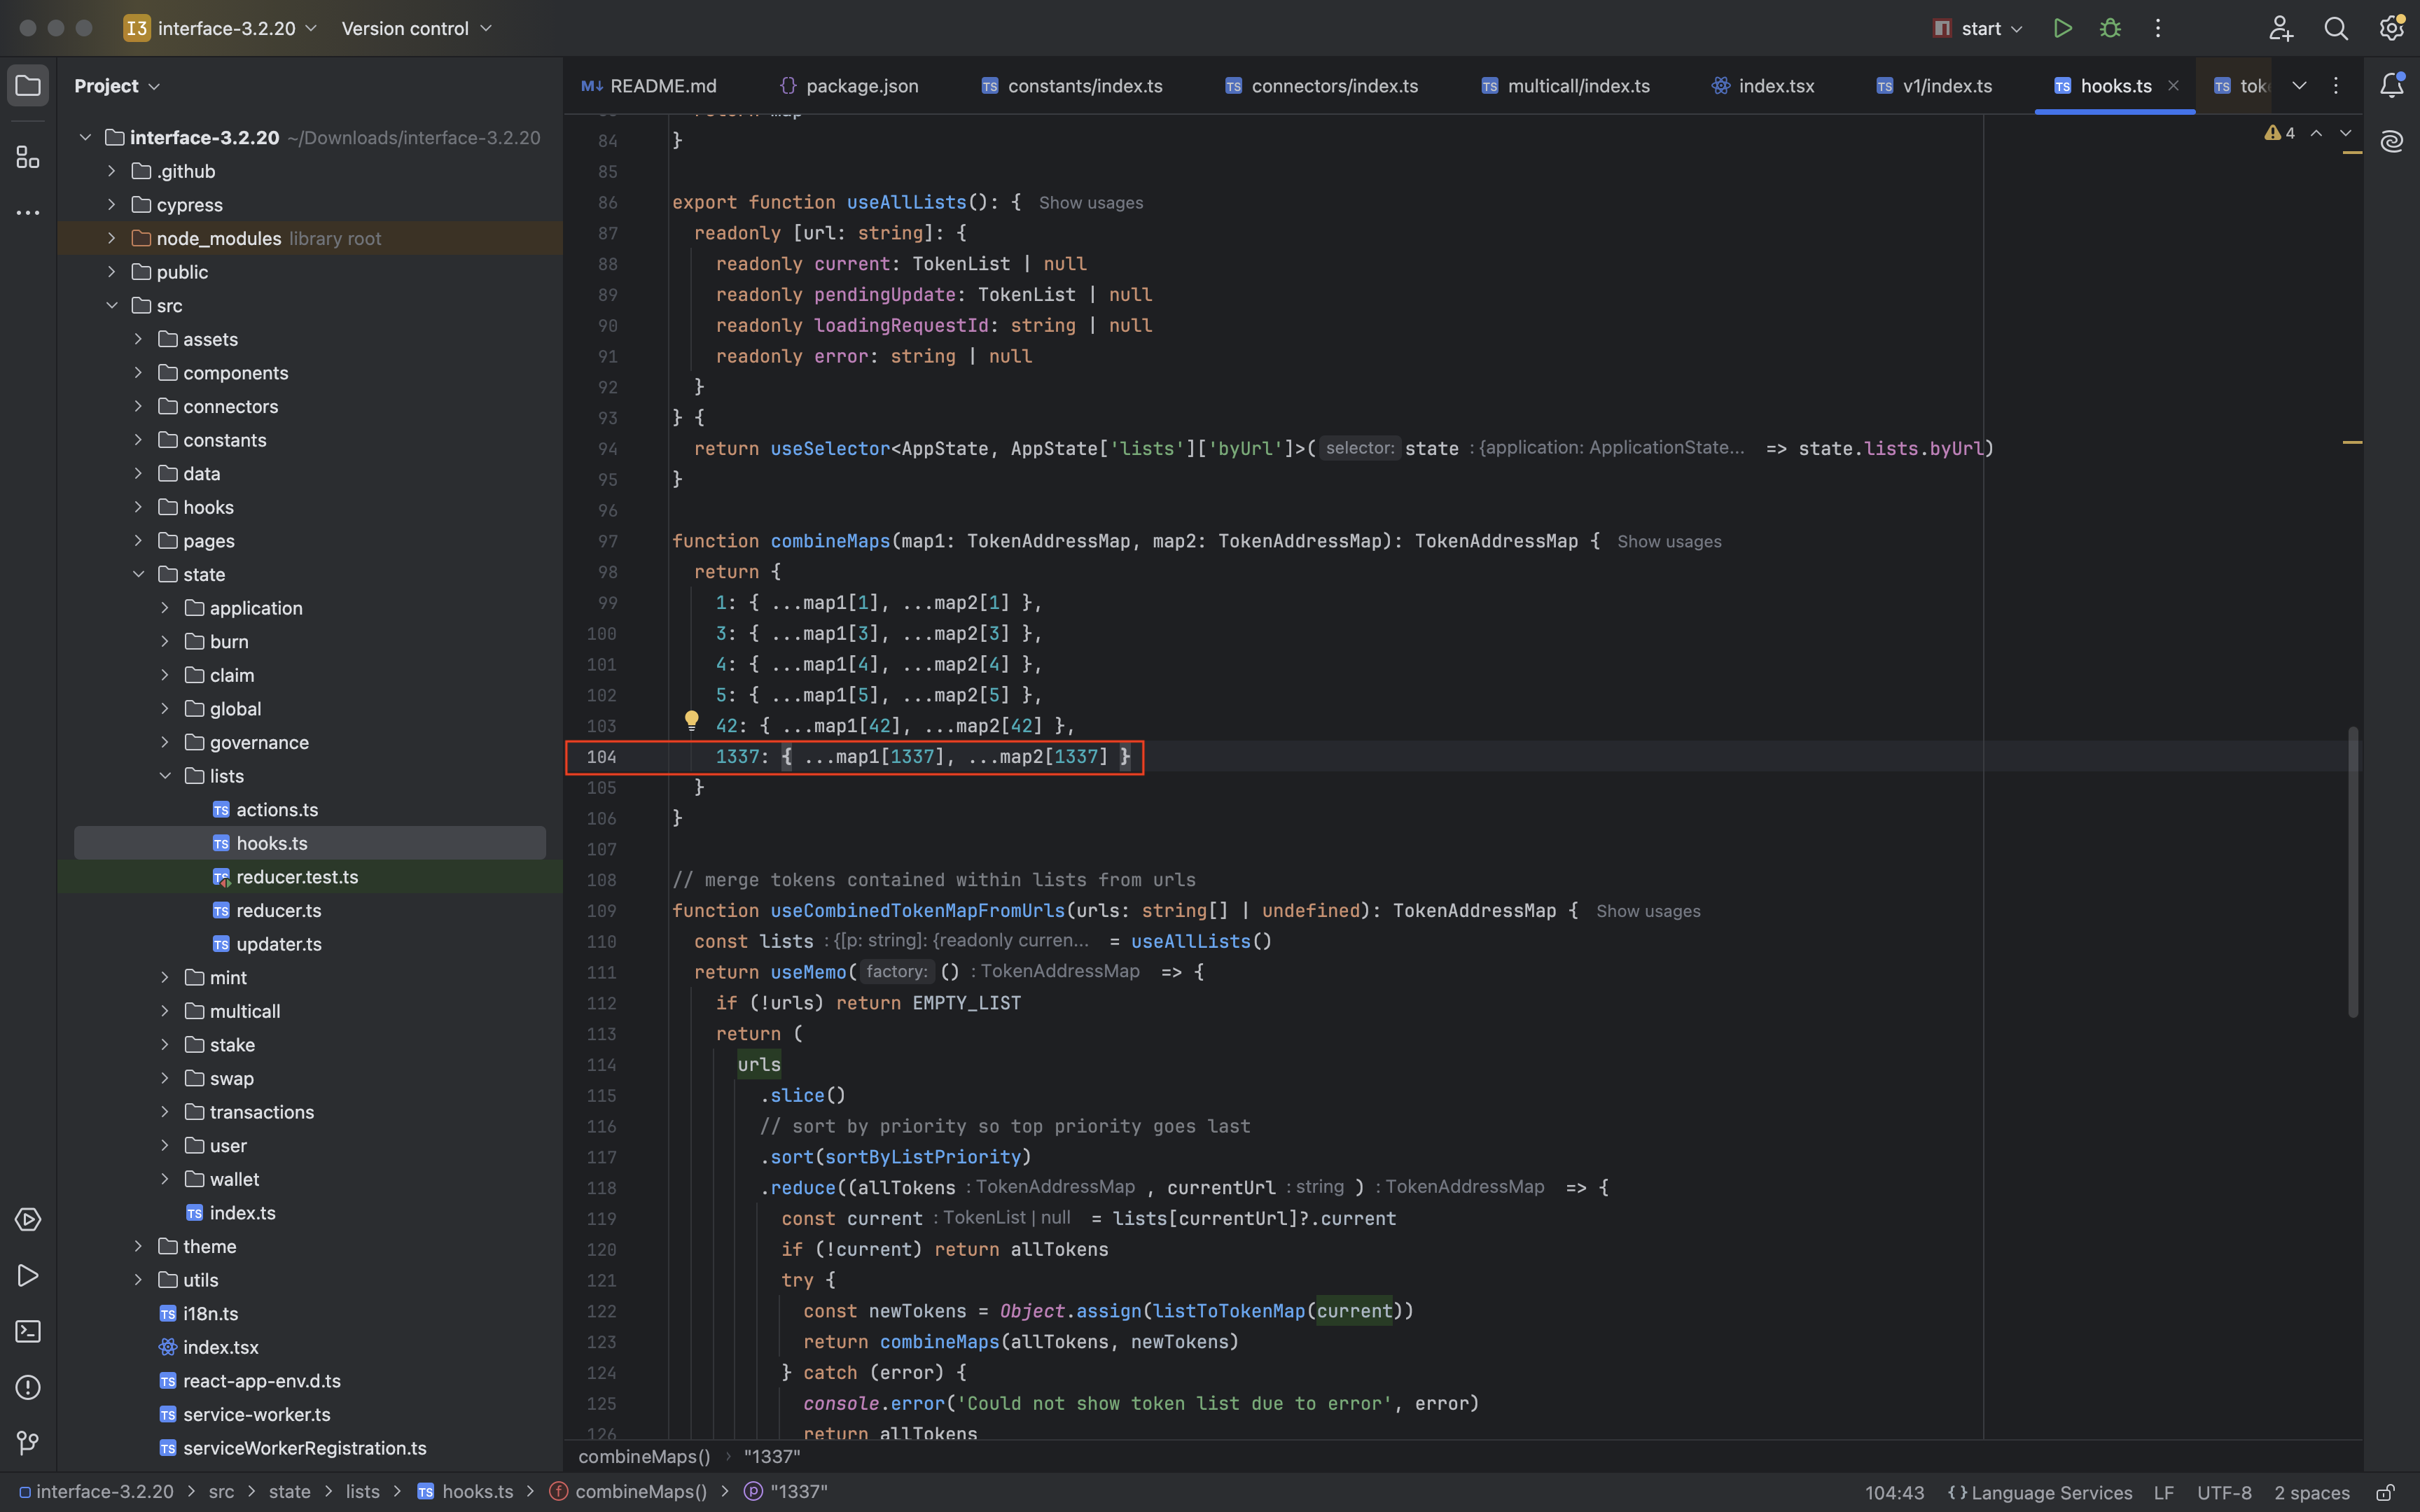
- 在
src/state/lists/hooks.ts添加EMPTY_LIST:
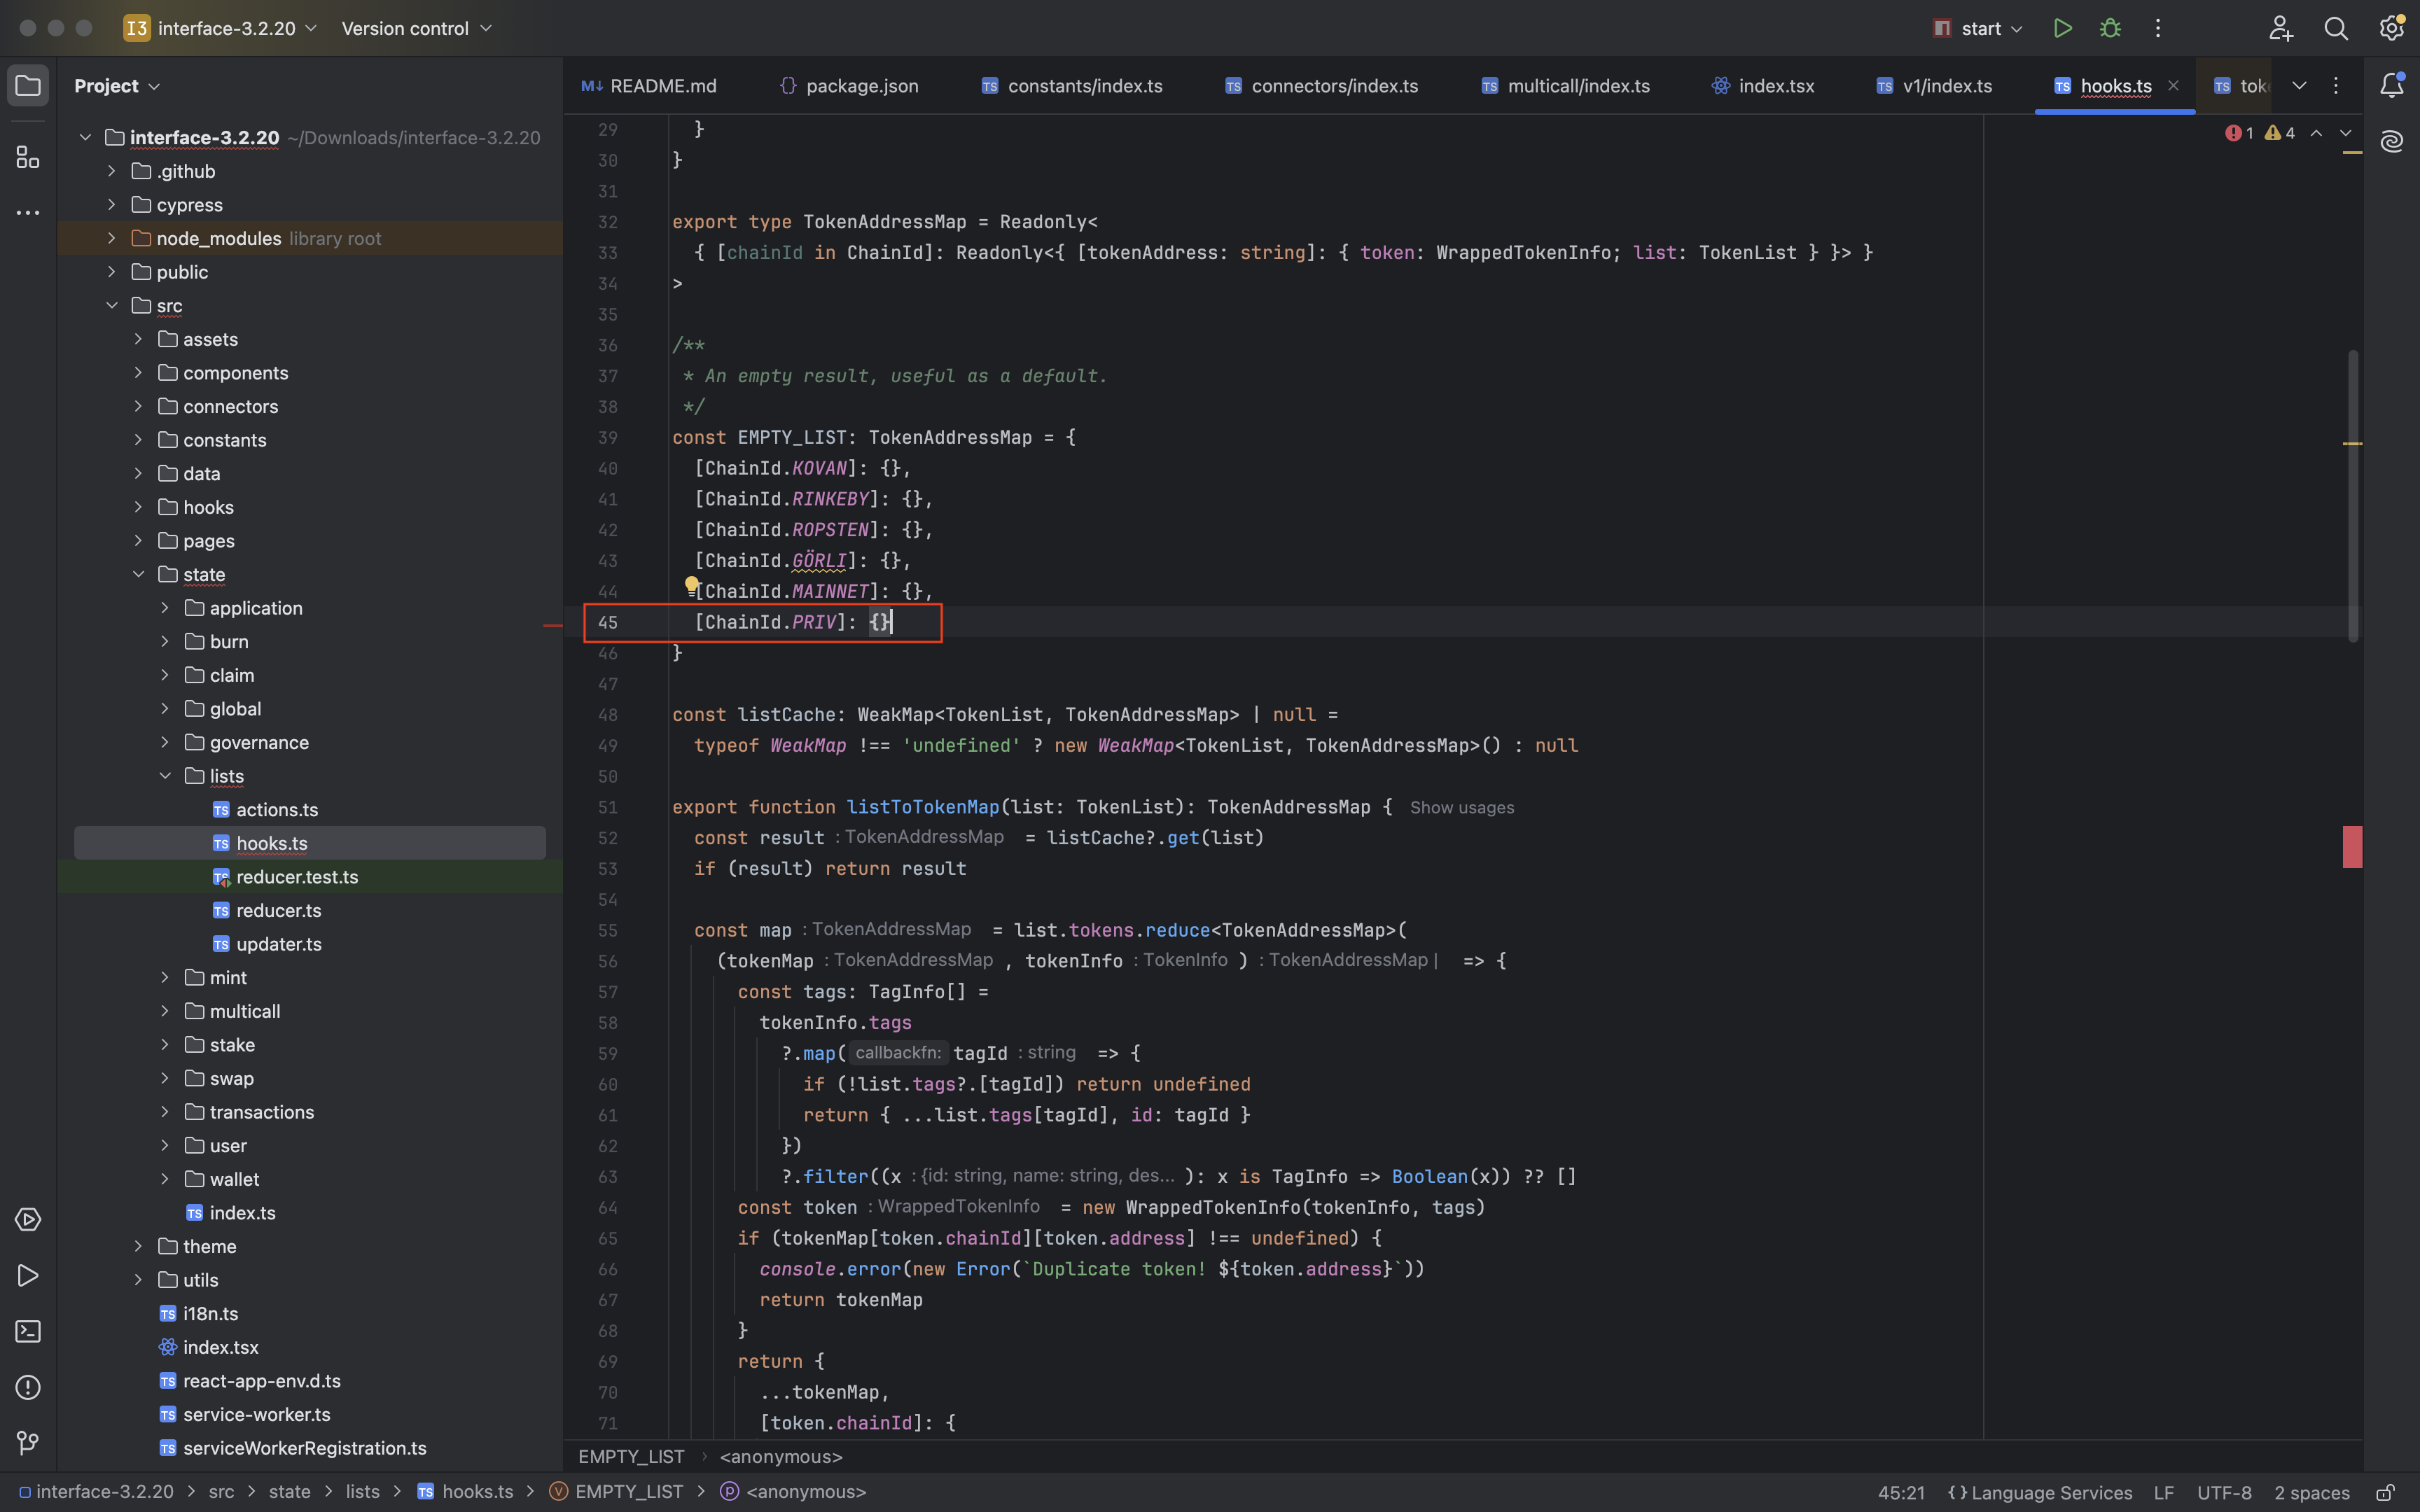
添加TokenAddressMap:
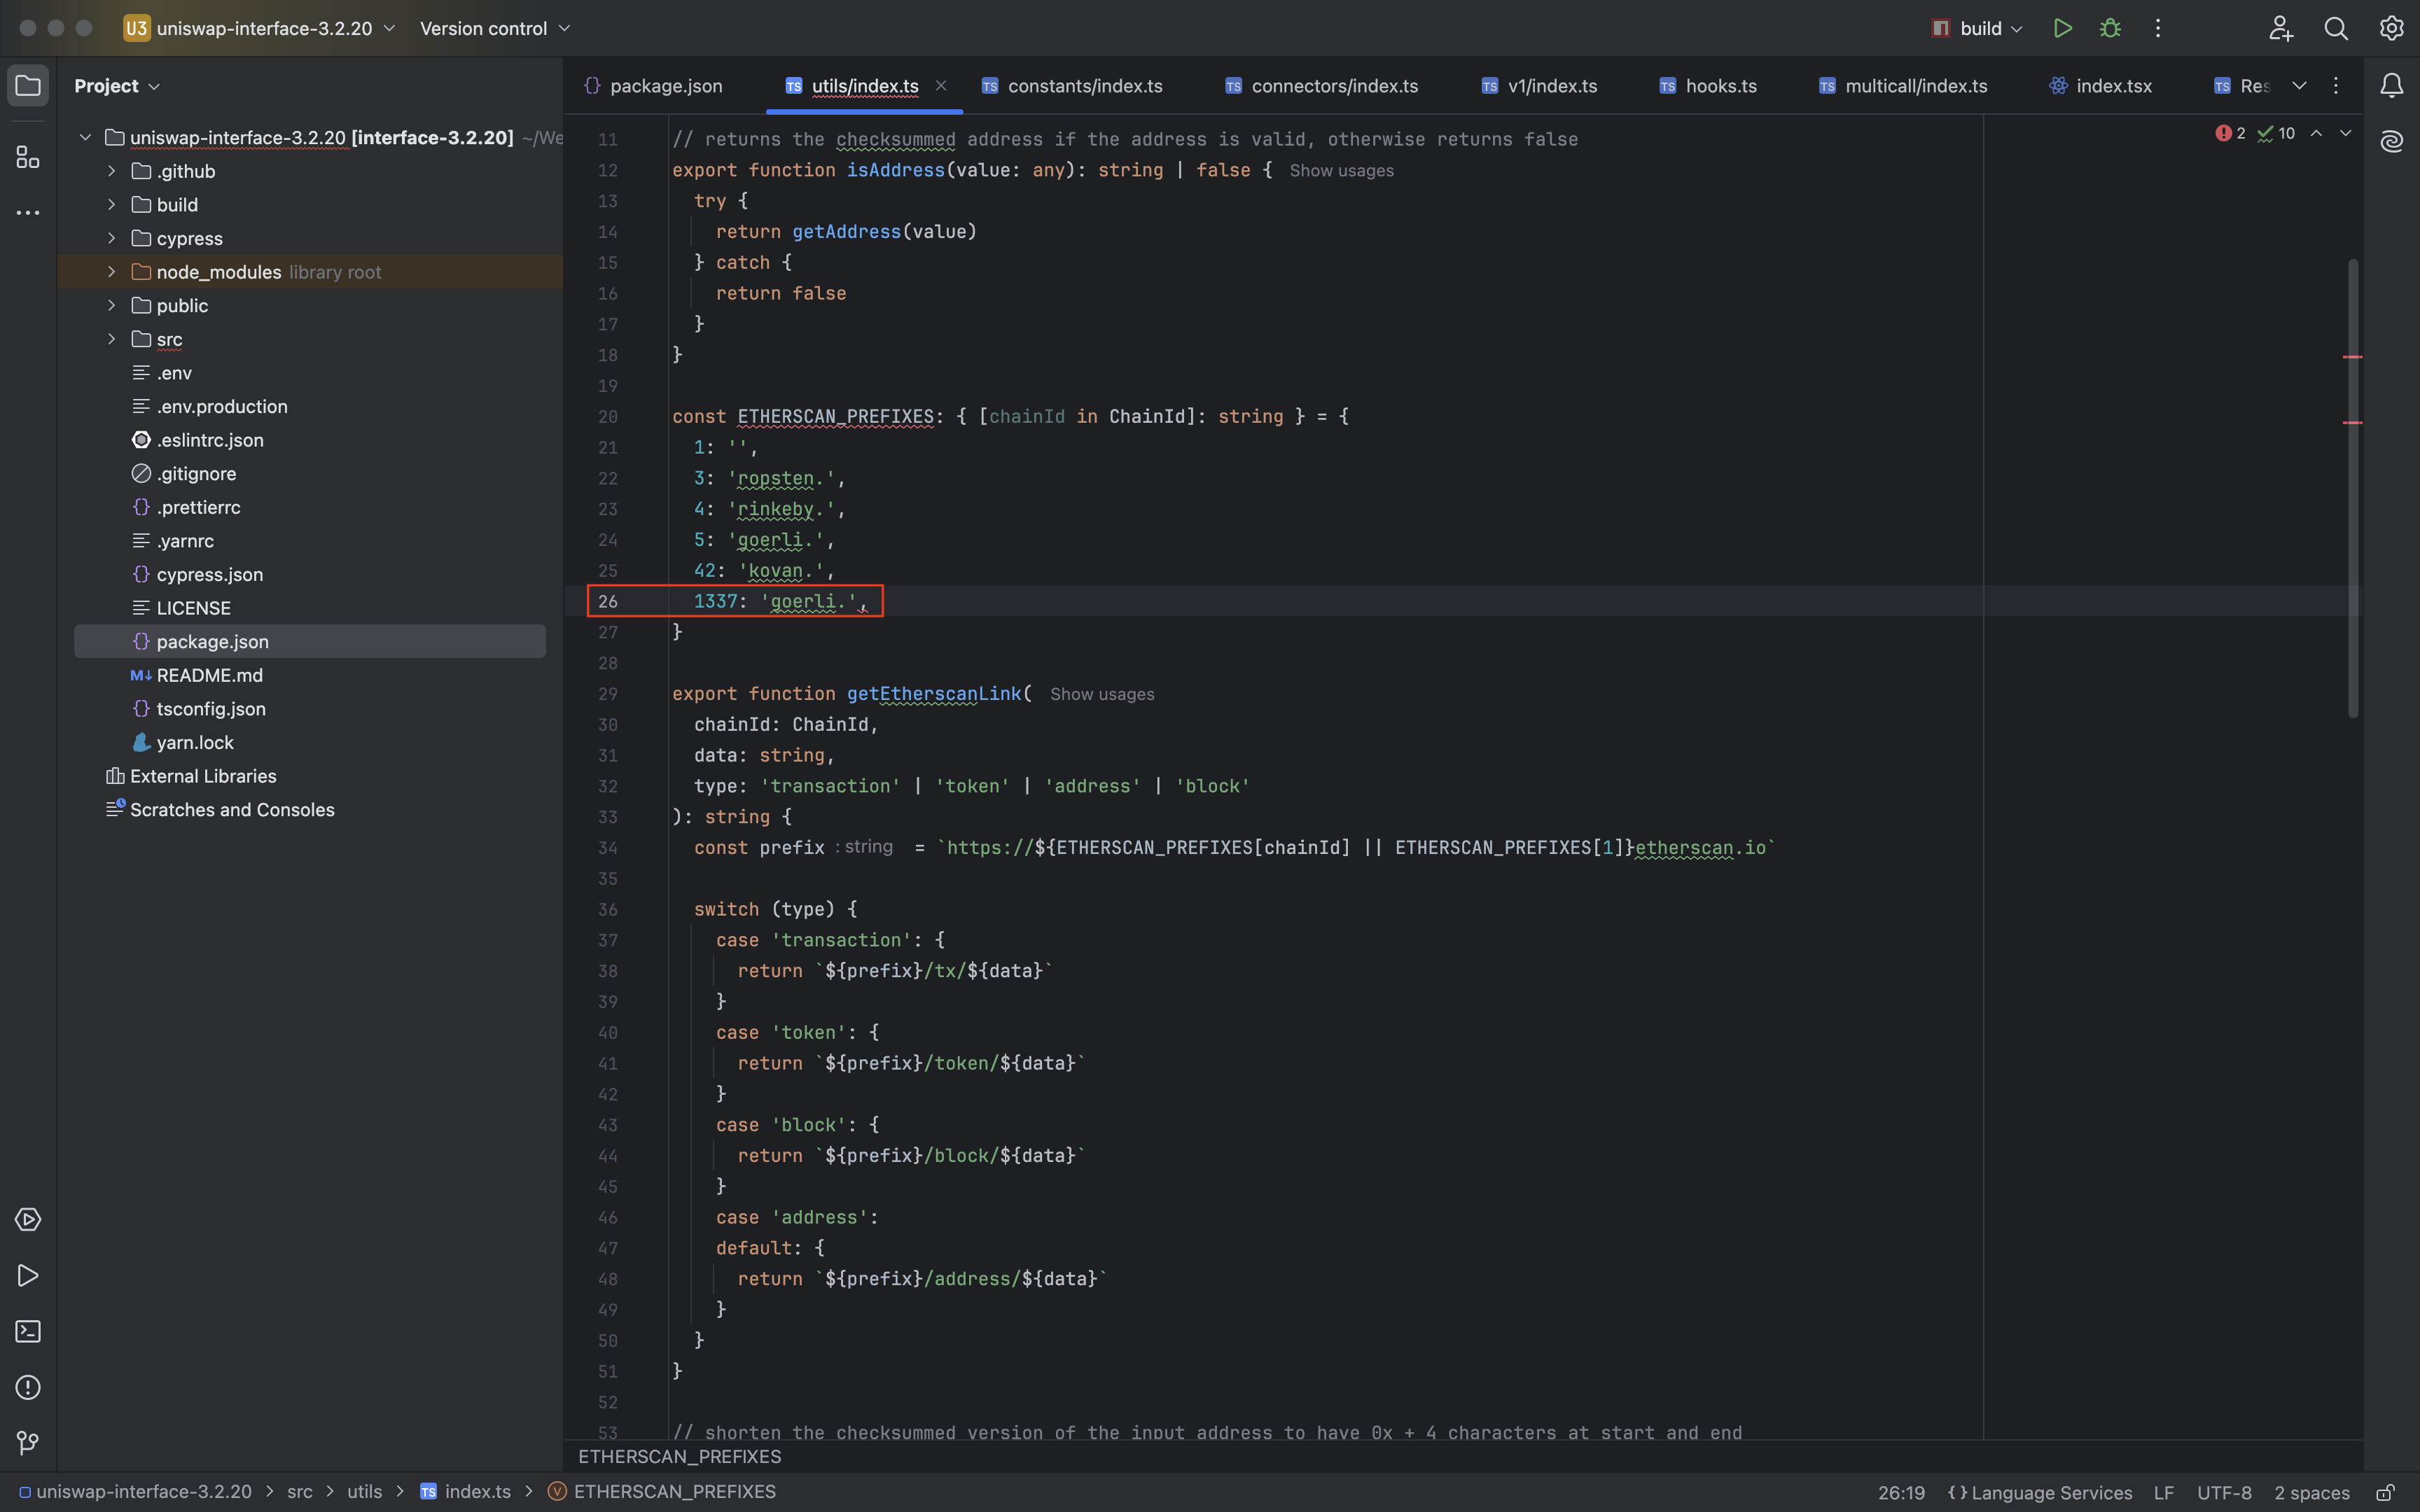
- 在
src/utils/index.ts添加ETHERSCAN_PREFIXES,没有区块链浏览器,所以复制goerli网络的:
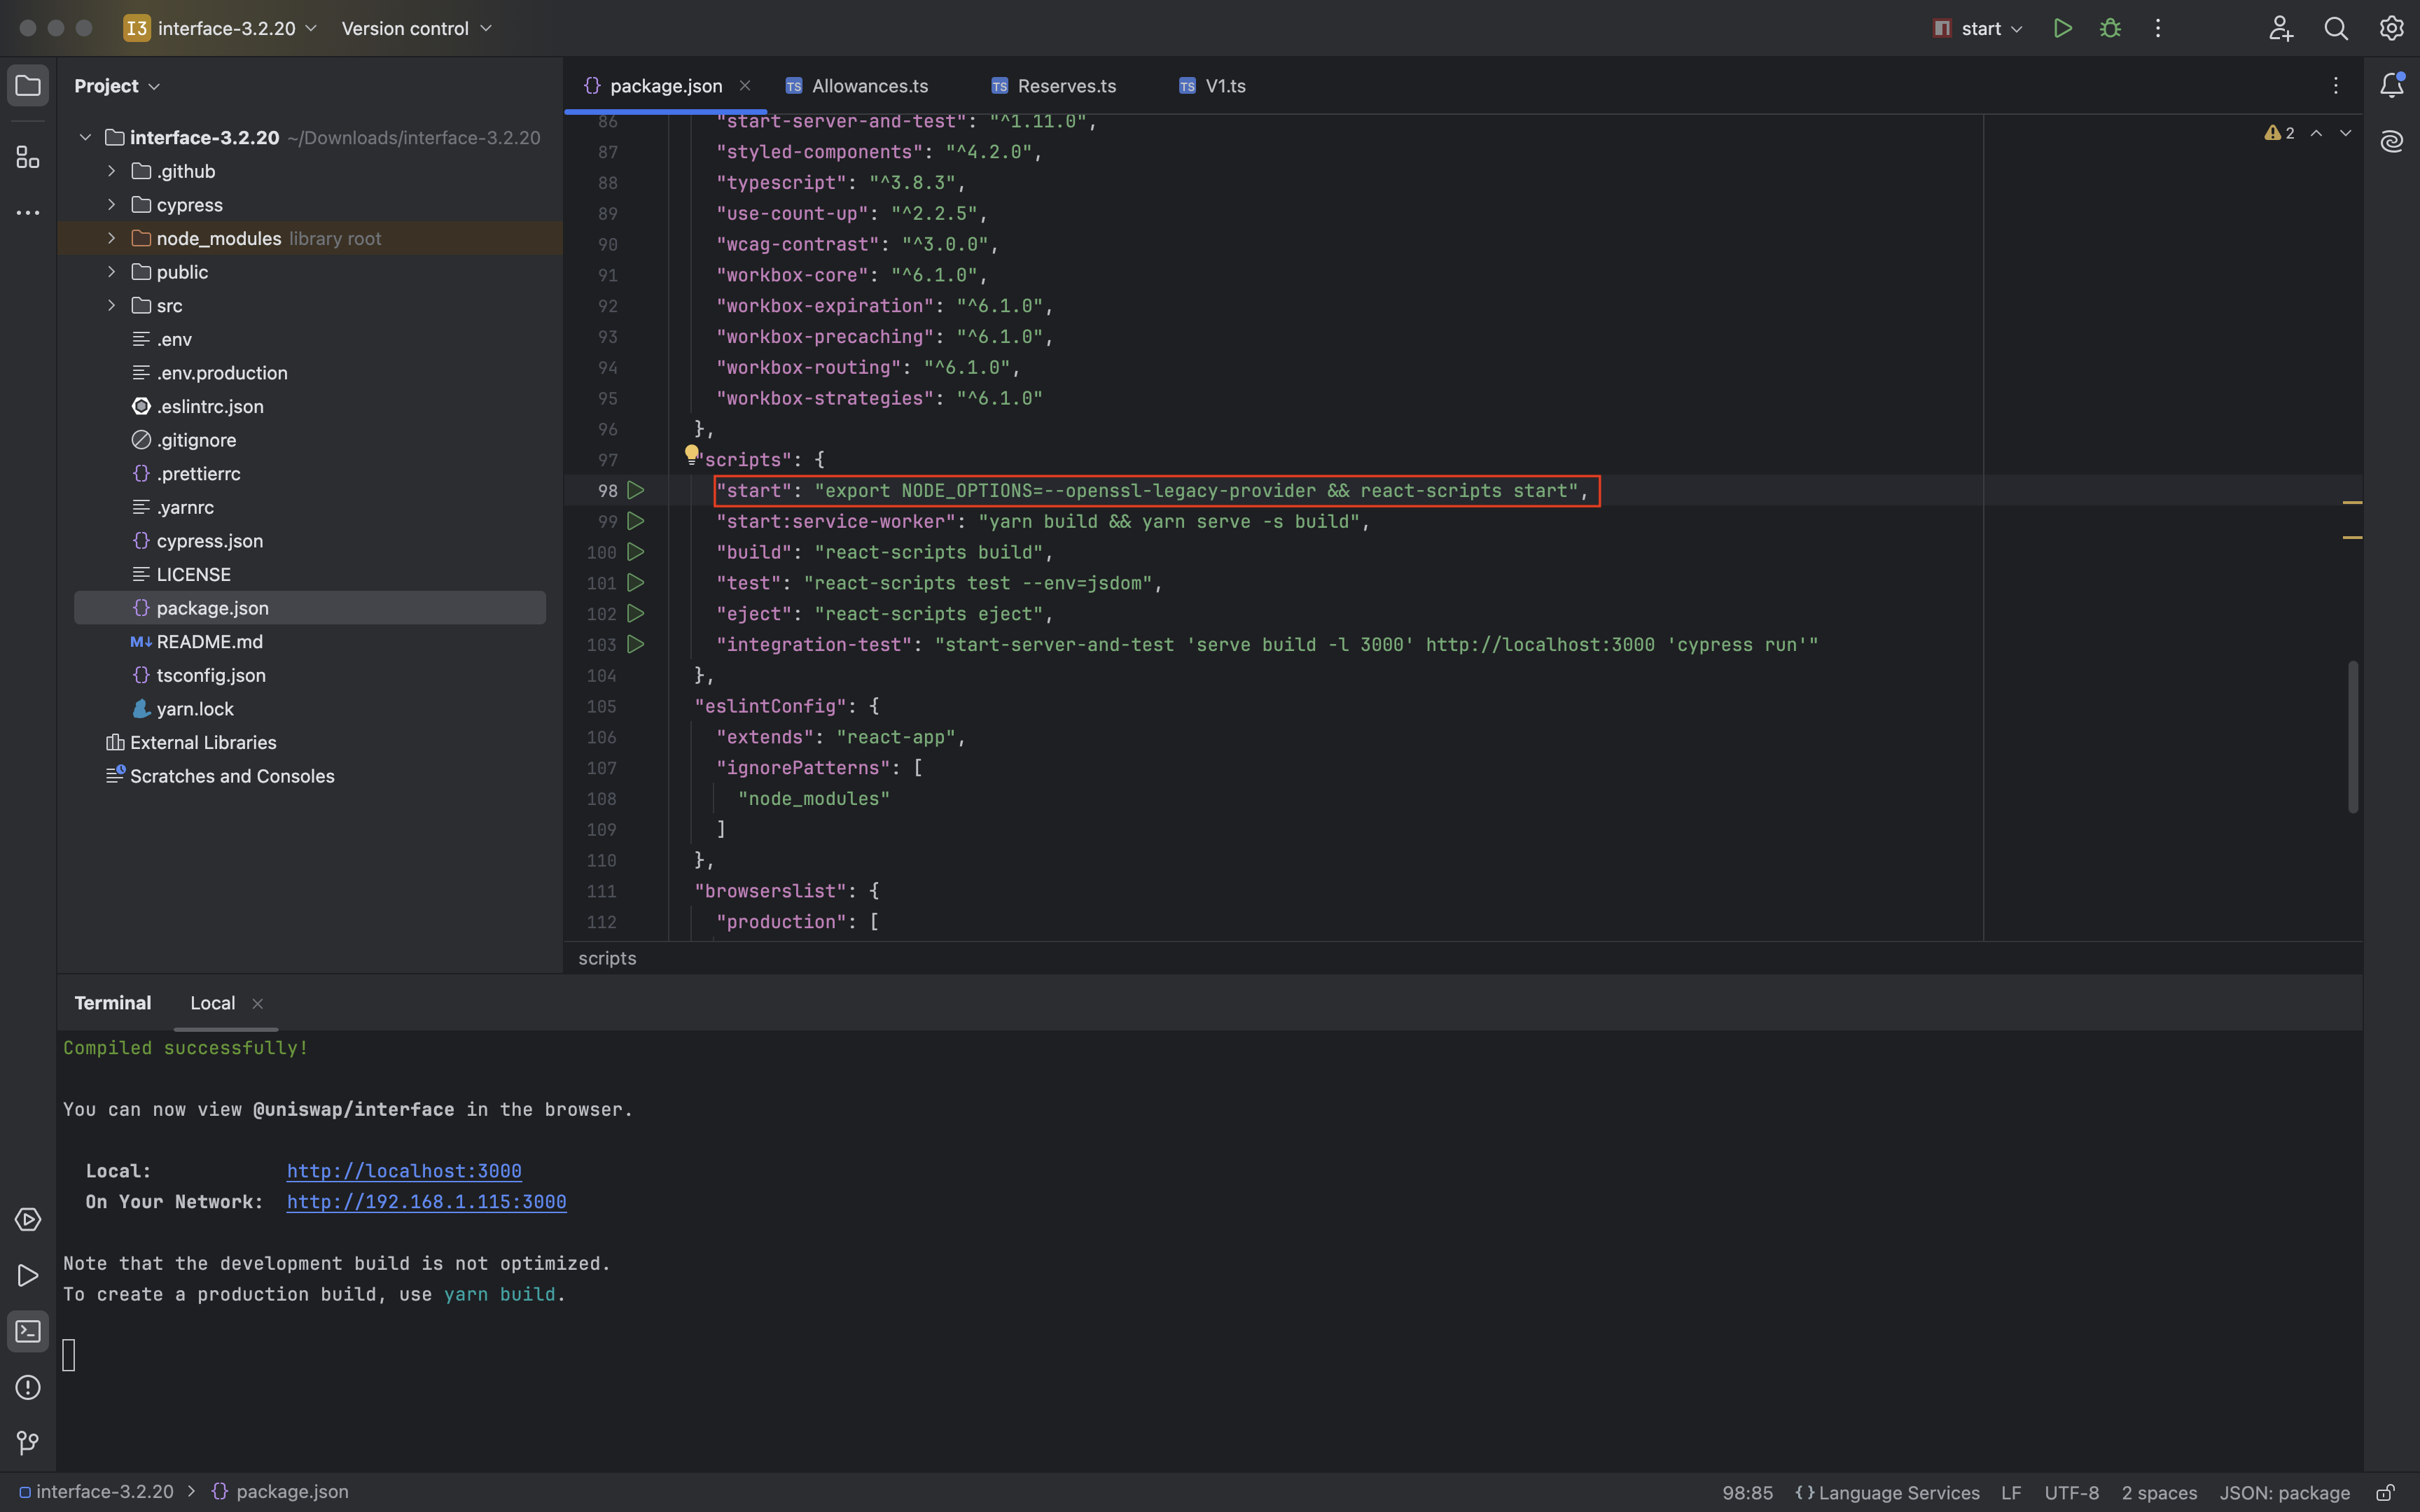
- 修改启动脚本,添加
export NODE_OPTIONS=--openssl-legacy-provider &&:
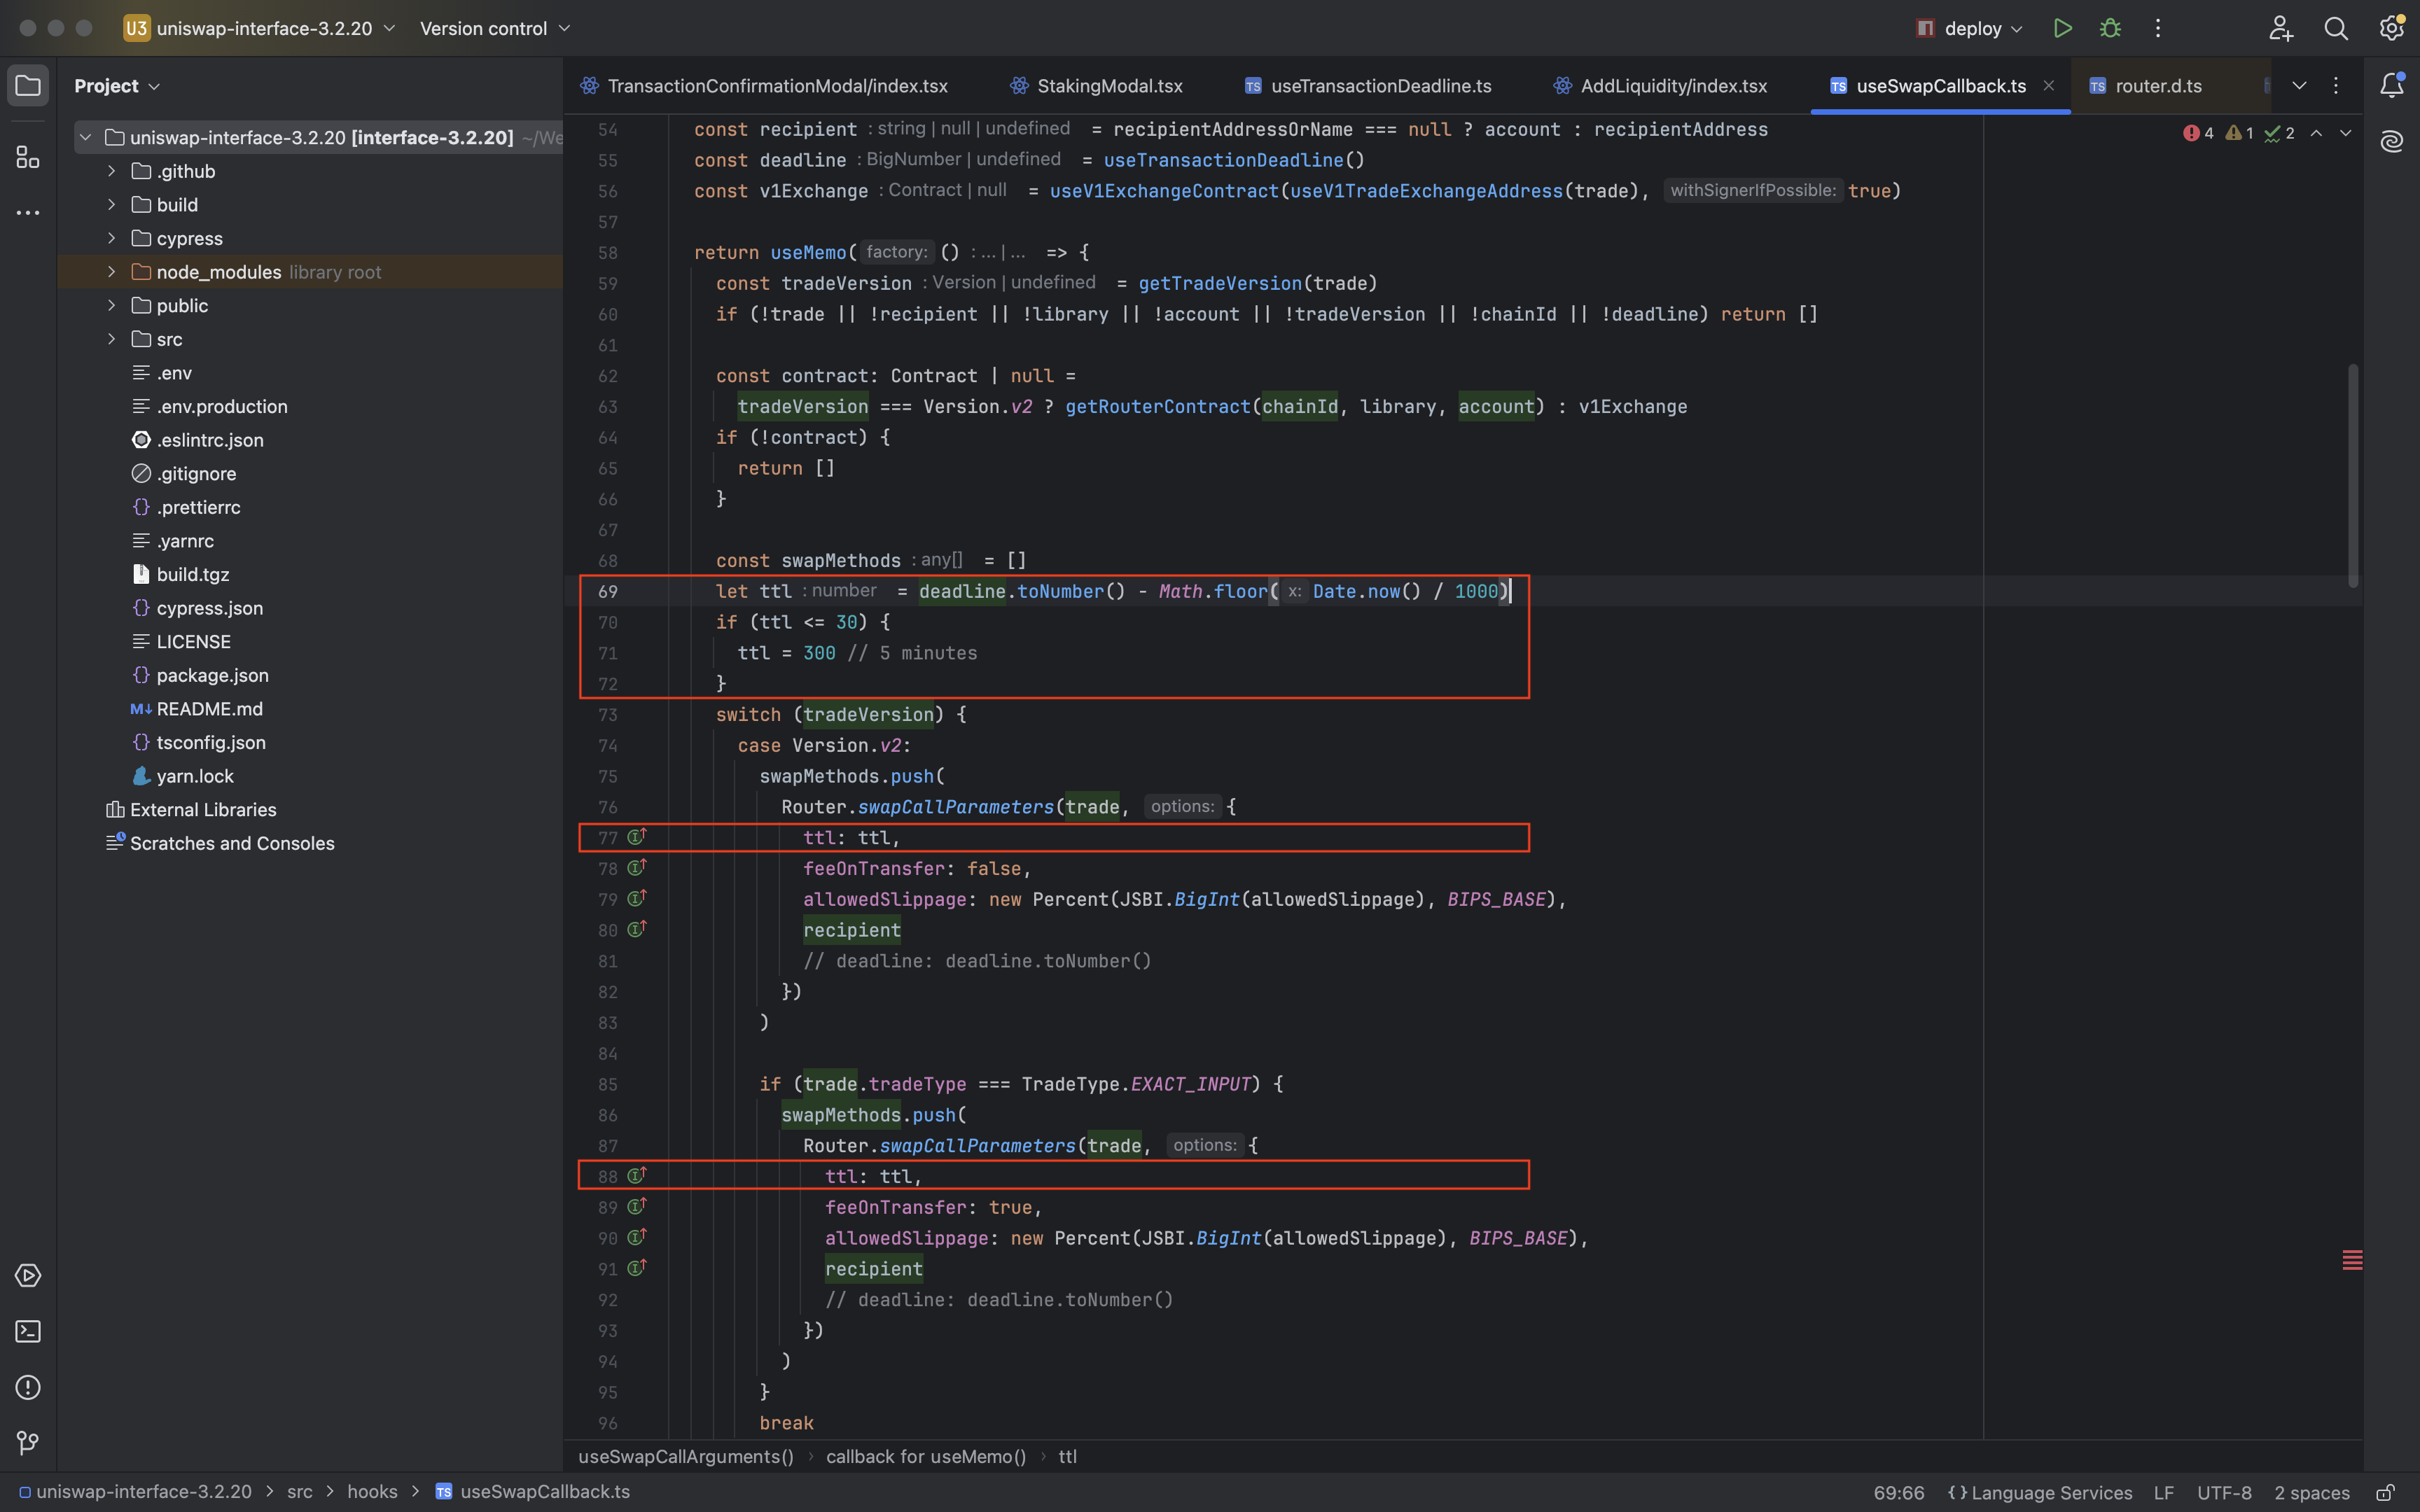
- 此版本有一个Bug,Swap 时会因为过小的 deadline 而导致失败,需要将
src/hooks/useTransactionDeadline.ts作如下修改:
启动interface
# yarn 版本 1.22.22
yarn
yarn start
添加代币列表
现在 uniswap v2 已经成功部署了,如果我们需要在交易所添加自己的代币。
uniswap v2 前端显示的代币列表配置在 uniswap-interface/src/constants/lists.ts 文件中的 DEFAULT_LIST_OF_LISTS 常量数组,数组元素的值可以是一个 http地址、ifps地址 和 ENS name。地址返回结果必须是指定结构的 json 文件,我们可以通过向 DEFAULT_LIST_OF_LISTS 常量数组添加新的地址达到添加自定义代币的目的。
下面就来通过添加一个代币详细描述这个过程。
1. 创建 tokens.json 文件
文件格式如下:
{
    "name": "Test Tokens List",
    "version": {
        "major": 1,
        "minor": 0,
        "patch": 0
    },
    "logoURI": "https://raw.githubusercontent.com/trustwallet/assets/master/blockchains/ethereum/assets/0x7D1AfA7B718fb893dB30A3aBc0Cfc608AaCfeBB0/logo.png",
    "timestamp": "2025-01-17 02:18:00.000+08:00",
    "tokens": [
	{
            "chainId": 1337,
            "address": "0x5d4E9CF09A183c5565a444BB52242cE53a58017b",
            "name": "WETH",
            "symbol": "WETH",
            "decimals": 18,
	    "logoURI": "https://raw.githubusercontent.com/Uniswap/assets/master/blockchains/ethereum/assets/0xC02aaA39b223FE8D0A0e5C4F27eAD9083C756Cc2/logo.png"
        }
    ]
}
tokens 字段是一个数组类型,它负责描述代币列表包含的所有代币。我们在里面添加了一个 WETH (当然也可以添加多个代币),符号是 WETH,合约地址是 0x5d4E9CF09A183c5565a444BB52242cE53a58017b。请注意里面有一个 chainId 字段,值为 1337,这是因为 我们的测试网络的 chainId 是 1337,前端只有在钱包连接网络的 chainId 为 1337 时才会显示这个代币。
2. 上传 tokens.json 文件
tokens.json 文件完成编辑后就可以上传至服务器了。随便上传到哪里都可以,比如你自己的 HTTP 文件服务器,只要能够公网访问就行,可以将它上传到gist.github.com (需要翻墙)。
3. 在前端添加 Tokens List
填写地址:https://asset.flxdu.cn/dev/tokens.json
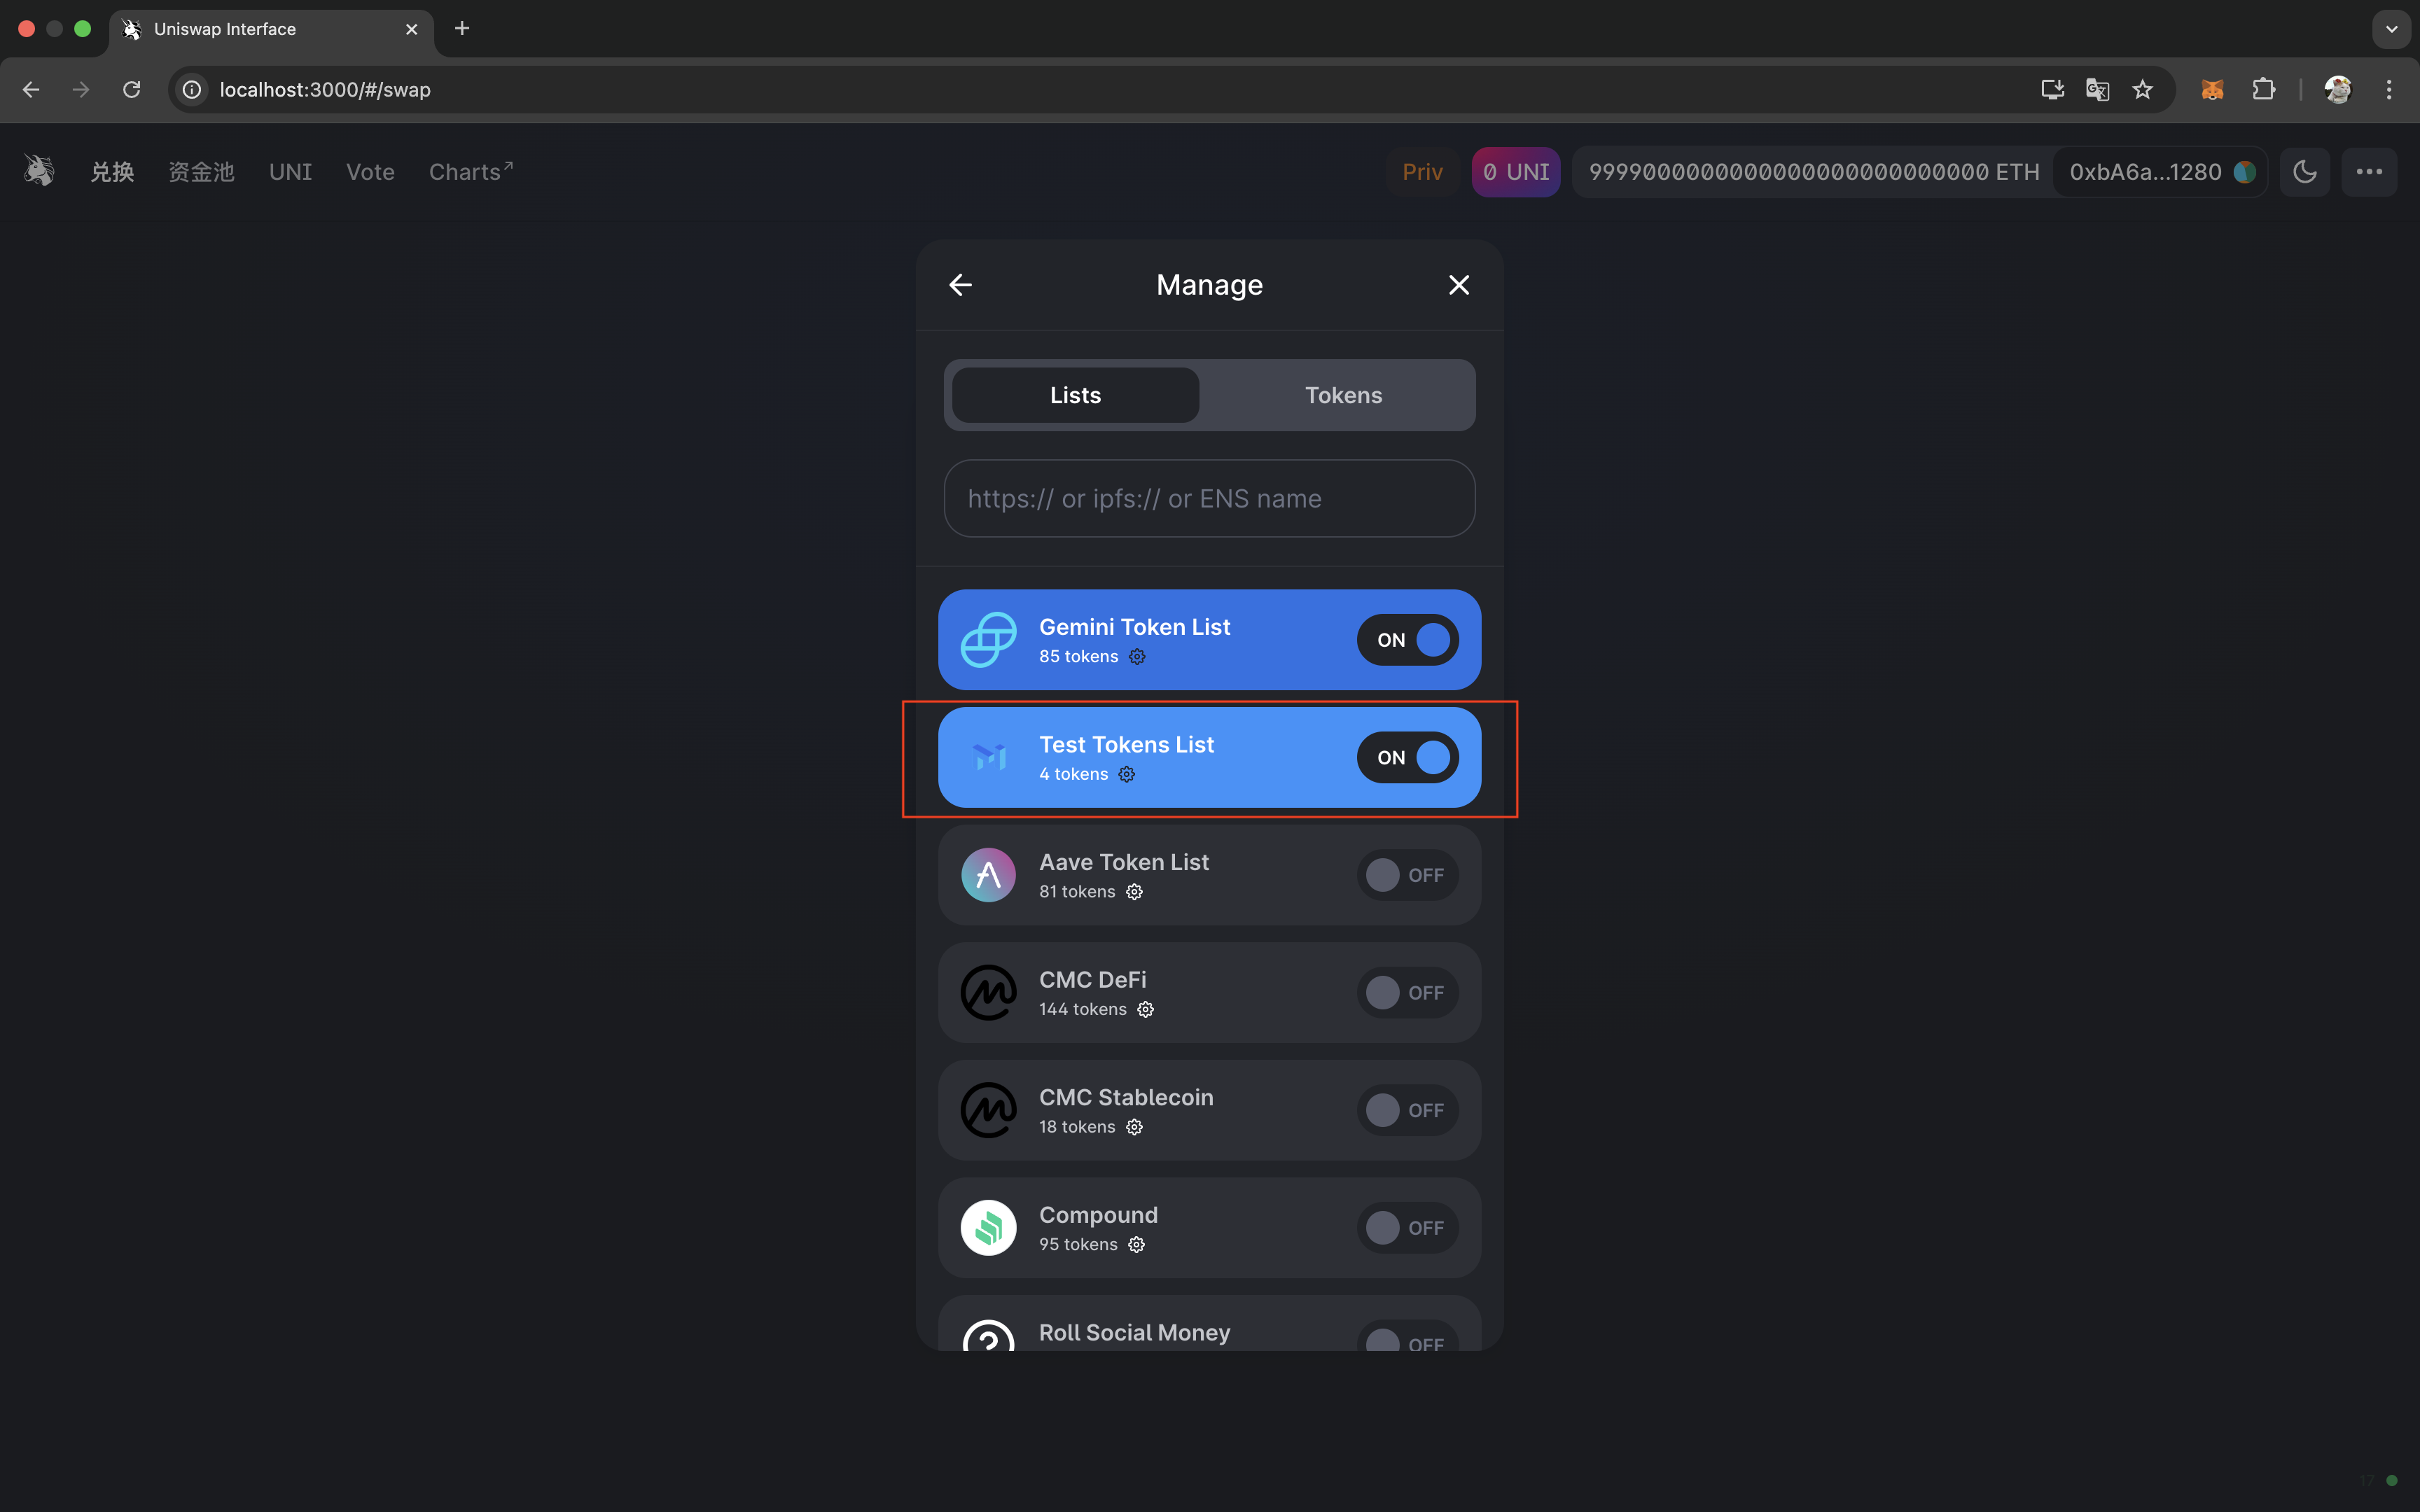
随后即可添加流动性,进行兑换等操作。